Backups are very crucial in any IT related operations. They are your fallback mechanism, just in case things go southwards. In this blog, we will discuss about configuring Azure VM-level backup.
- Go to VM to configure VM-level Backup of any VM.
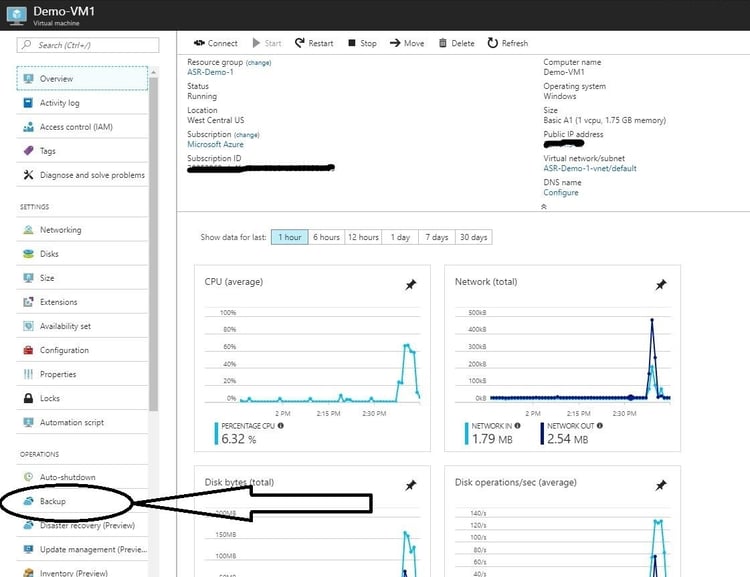
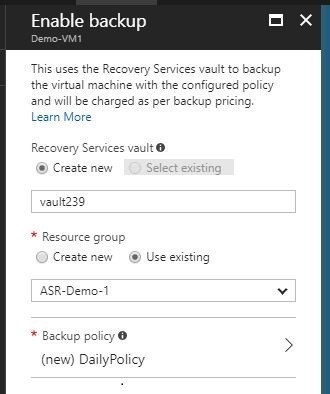
- Select Backup Option then it will open a new blade to choose the Recovery Service Vault. You can either choose existing Recovery Service Vault if you have created it earlier or create new one.
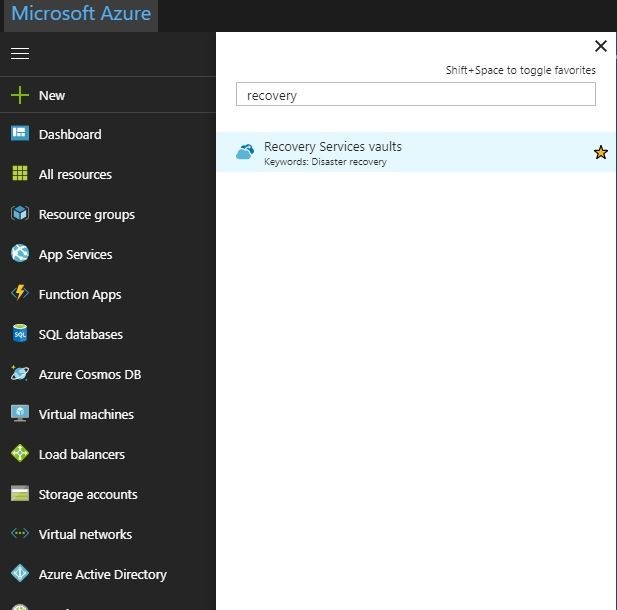
- Also, there is another way to create Recovery Service Vault by going into Azure Portal, More Services and search for Recovery Service vault.
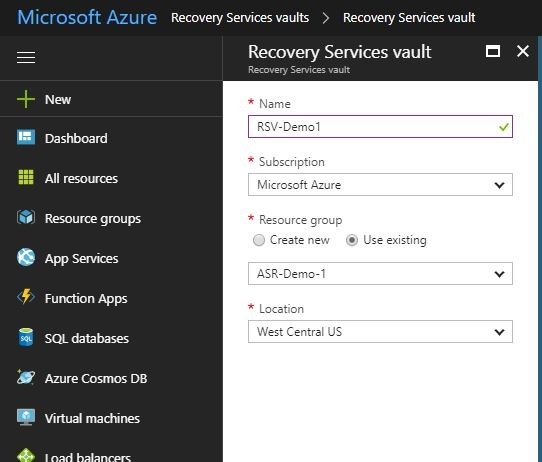
- Click on Crete new Recovery Service Vault. It will then ask you for Details like Recovery Service Vault Name, Subscription, Resource Group nam and Lovcation for Recovery Service Vault.
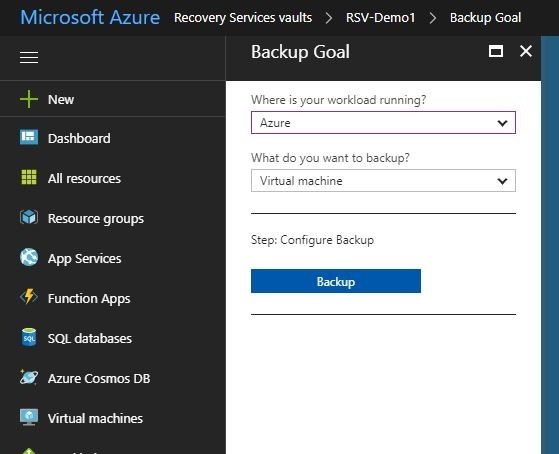
- Once you create Recovery Service Vault, click on Backup option and select the VM you are looking to backup. While configuring Backup it will ask from where you want to backup the server.
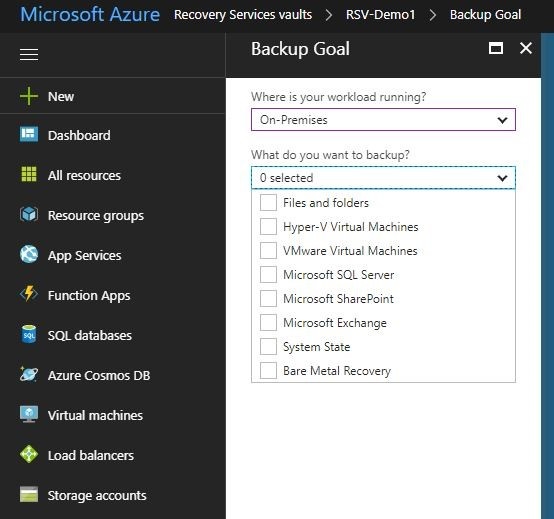
- It will provide you the options to select the server from on-premises. There are lots of supported on-premises workloads.
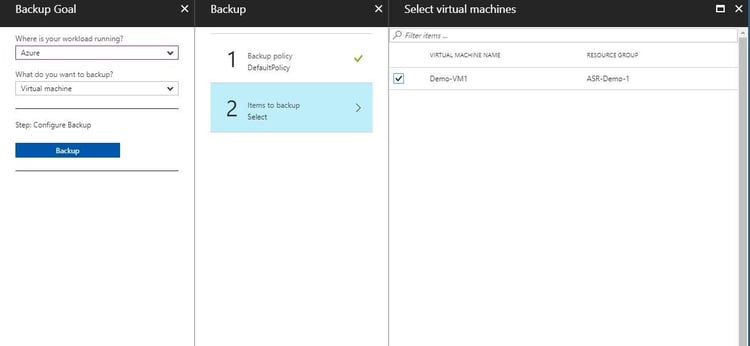
- Select the workload source and then select the servers to backup.
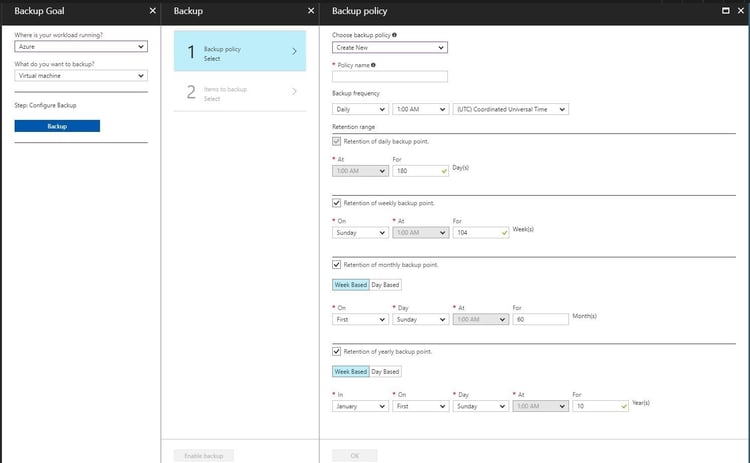
- After servers, we need to specify the Schedule, backup retention of Daily, Weekly, Monthly and Yearly backup data.
- After specifying schedule and selecting the server you need to enable the Backup.
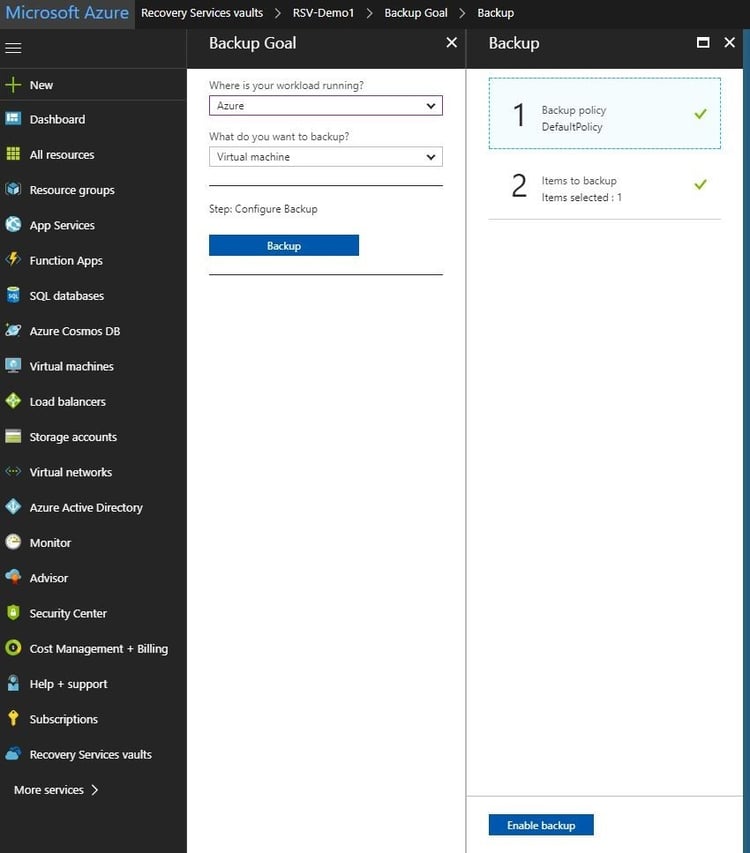
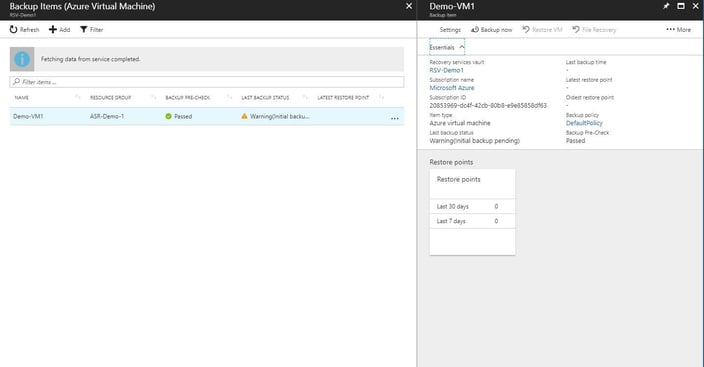
- Once you configured backup for server, you can monitor the Job in the Backup Items option. It will show the progress of all backup server jobs.
With right approach, configuring Azure VM-level backups are not that difficult. If you have any queries then please write to us in comment section.
Read more about Azure Site Recovery and how to protect Your Workload Using Azure Recovery Services.


