

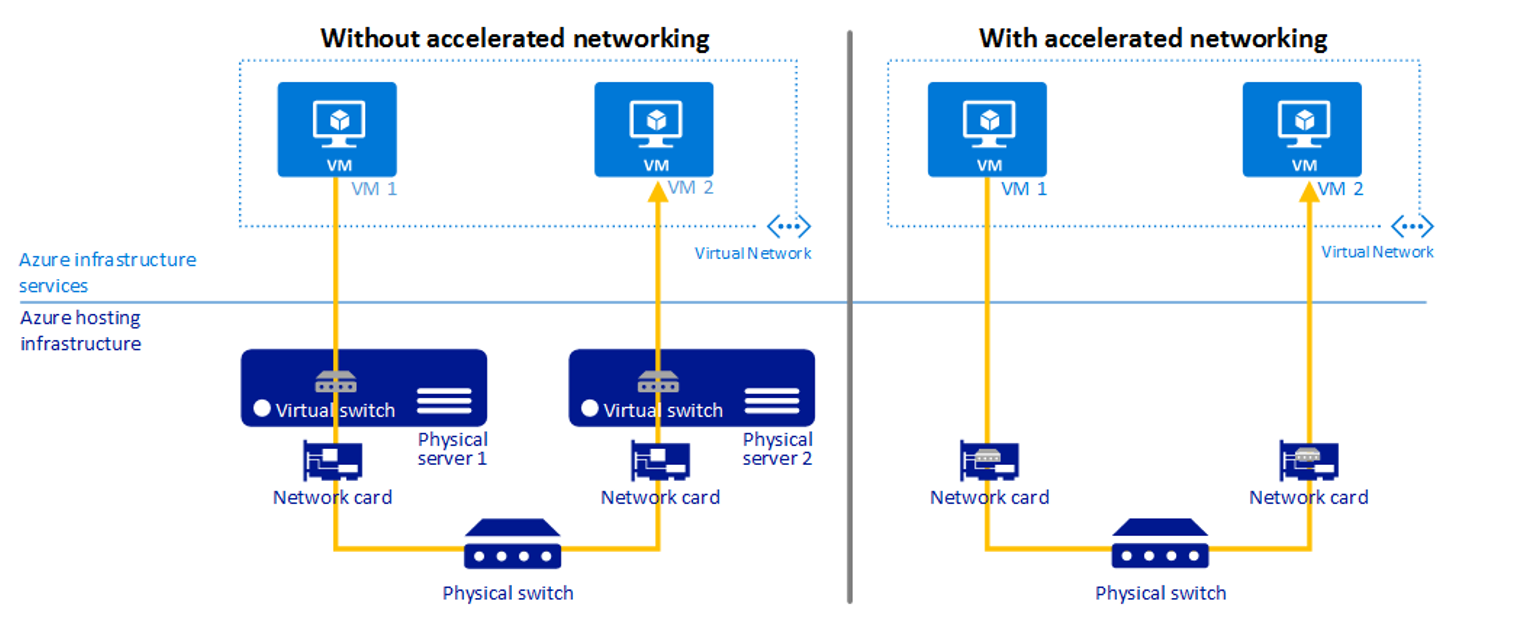
Accelerated Networking enables single root I/O virtualization (SR-IOV) to a VM, greatly improving its networking performance. This high-performance path bypasses the host from the Datapath, reducing latency, jitter, and CPU utilization, to be used with the most demanding network workloads on supported VM types.
 Source: https://learn.microsoft.com/en-us/azure/virtual-network/accelerated-networking-overview?tabs=redhat
Prerequisite
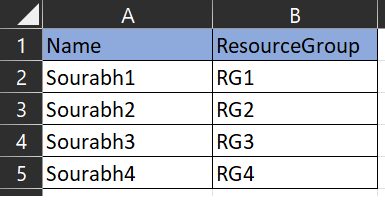
- An Excel sheet filled with VM Name and Resource Group (as shown in later part of blog)
- PowerShell Full access
- Contributor access to your Azure account
Steps to Enable Accelerated Networking Manually:
- Go to Azure portal -> Virtual Machines -> Select your VM -> Stop
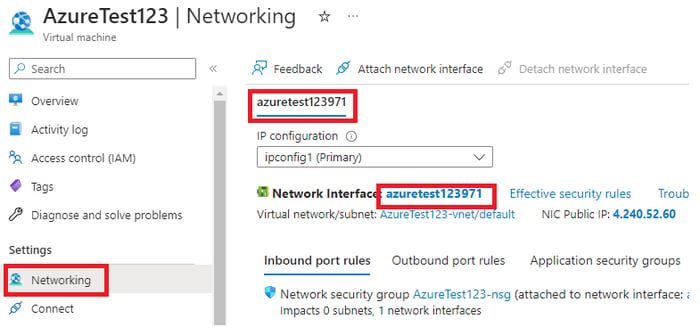
- Networking -> Your NIC
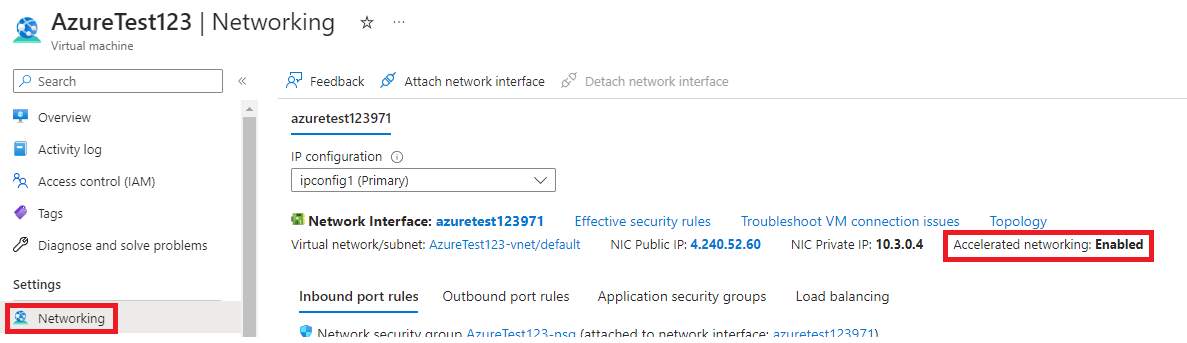
- “Edit Accelerated Networking” -> Enabled

- Save + Start VM
Now, let’s imagine the same steps to be performed for 200 machines. Isn’t that time-consuming? Also, it might lead to some errors in the process of the task.
To resolve this issue, we can utilize PowerShell and Excel sheets.
- Steps to Enable Accelerated Networking using PowerShell + Excel sheet
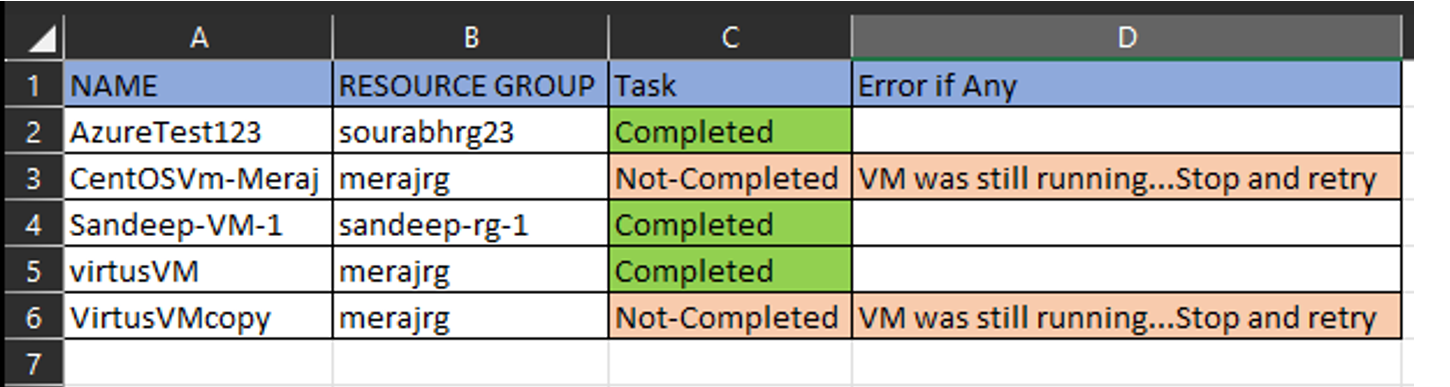
- Here, I have a sheet with VM Name and Resource Group Name to enable accelerated networking on.
- Login to PowerShell -> Connect to your Az Account using the following command.
Connect-AzAccount - Once you are logged in to Azure account -> Select your Subscription

- Once you select your Subscription, you need to import the Excel file into the PS.
#--------------------------Create/Get Excel File---------------------------
$file = "C:\Users\sourabh.majali\Downloads\ExcelSheet.xlsx"
$sheetName = "Sheet1"
$objExcel = New-Object -ComObject Excel.Application
$workbook = $objExcel.Workbooks.Open($file)
$sheet = $workbook.Worksheets.Item($sheetName)
$objExcel.Visible=$false
$rowMax = ($sheet.UsedRange.Rows).count
$rowcustname ,$colcustname = 1,1
$rowsubid ,$colsubid = 1,2
$rowtenantid ,$coltenantid = 1,3
This selects all the data in your Excel sheet and imports it into your PS script for further use.
The next series of commands is used to loop all the rows and columns of the Excel sheet to fetch the VM Name and their Resource Groups
for($i=1;$i -lt $rowMax;$i++)
{
$VMName=$sheet.Cells.Item($rowcustname+$i,$colcustname).text
$RG=$sheet.Cells.Item($rowcustname+$i,$colcustname+1).text
Write-Host "_________________________________________" -ForegroundColor Yellow
Write-Host "Checking for machine $VMName...." -ForegroundColor Green
$vm=Get-AzVM -Name $VMName -ResourceGroupName $RG
$status= (Get-AzVM -Name $vm.Name -ResourceGroupName $vm.ResourceGroupName - Status).Statuses[1].DisplayStatus
if($status -ne "VM deallocated")
{
Write-Host "VM was still running...Stop the machine and retry" -ForegroundColor Red
$sheet.Cells.Item($rowcustname+$i,$colcustname+3)= "VM was still running...Stop and retry"
}
else
{
Write-Host "$VMName is in Deallocated state...proceeding further..." -ForegroundColor White
$nics=$vm.NetworkProfile.NetworkInterfaces
foreach($nic in $nics)
{
Write-Host "Enabling Accelarated Networking on " $nic.Id
$GetNICDetails= Get-AzNetworkInterface -ResourceId $nic.Id
$GetNICDetails.EnableAcceleratedNetworking = $true
try
{
Write-Host "Saving NIC..." -ForegroundColor White
Set-AzNetworkInterface -NetworkInterface $GetNICDetails -AsJob | Wait-Job
$sheet.Cells.Item($rowcustname+$i,$colcustname+2)= "Completed"
}
catch
{
Write-Host "------Error Found-------" -ForegroundColor Red
$sheet.Cells.Item($rowcustname+$i,$colcustname+2)= "Error Found"
}
}
}
}
$outputpath="C:\Users\sourabh.majali\Downloads\ExcelSheet_Completed.xlsx"
$workbook.SaveAs($outputpath)
$objExcel.Quit()
#------------------------------------END-------------------------------------------------#
Output

How Script Works?
- The script will check if the machine is in deallocated state or not, if yes, it will proceed further, and if not, it will be marked as“Stop the machine & retry”.
- If there are multiple NICs, the script will loop in all the NICs for that machine and enable accelerated networking.
- “Saving NIC” is the part in the above screenshot where it is checked for an error, if there’s any, and marked in output to check the details.
- Following is the sample output excel sheet with details.
- This will be stored in your given path, example
C:\Users\sourabh.majali\Downloads\ExcelSheet_Completed.xlsx"
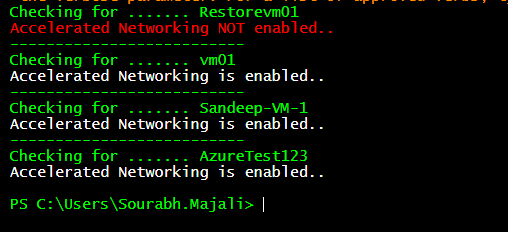
Next step would be to check for the errors and resolve the issues accordingly and once this is done, you can check back for the status for all the machine at once if they are reflecting accelerated networking or not using the following script,
$vms= Get-AzVM
foreach($vm in $vms)
{
$nics=$vm.NetworkProfile.NetworkInterfaces
foreach($nic in $nics)
{
Write-Host "--------------------------"
$GetNICDetails= Get-AzNetworkInterface -ResourceId $nic.Id
Write-Host "Checking for ......." $vm.Name
if($GetNICDetails.EnableAcceleratedNetworking -eq "True")
{
Write-Host "Accelerated Networking is enabled.." -ForegroundColor White
}
else
{
Write-Host "Accelerated Networking NOT enabled.." -ForegroundColor Red
}
}
}
Output
Takeaways
In various situations, it becomes necessary to manage and work on multiple machines, sometimes exceeding 100 resources. However, handling these tasks manually can be extremely time-consuming and prone to human error. By automating such processes, significant amounts of time can be saved. Automation also allows for easy tracking of progress and identification of issues, facilitating quick resolution. Additionally, automation enables the creation of comprehensive reports, providing valuable insights into the overall operations.


.png)