

Why do we need WAF?
Attacks against web servers are the most common among the issues in cybersecurity. Servers are often connected to a broader bandwidth, enabling these attacks to be increasingly efficient. Protecting web servers is important because not from the data perspective, the server can also be used as a bridge into the company’s network.
WAF provides centralized protection for your web application from the common exploits and vulnerabilities that make your web application bulletproof and secured in terms of attacks.
Benefits
Web vulnerabilities and attacks protection without changing your backend code.
Real-time protection monitoring logs.
Customization of rules as per application requirement.
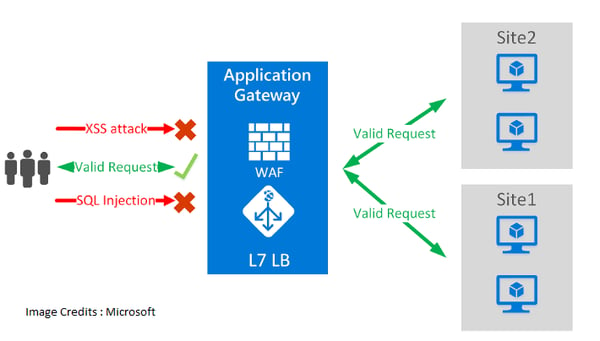
WAF Modes
Detection
Monitors and logs all threat alerts into a log file if we run WAF in "Detection" mode, it won't block any request but log them.
Prevention
When put in "Prevention" mode, attacks are detected and are blocked by its rules and the attacker simply receives 403 Forbidden Error stating that the attacker doesn't have access to the request.
Implementation:
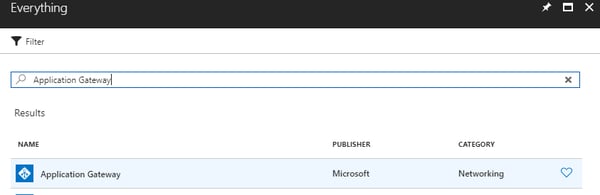
Step 1:- Search for Application Gateway in "Everything"
- Select Application Gateway
- Create
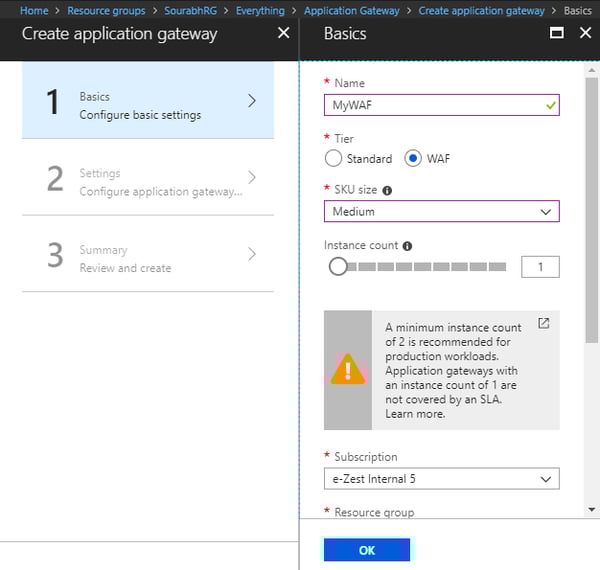
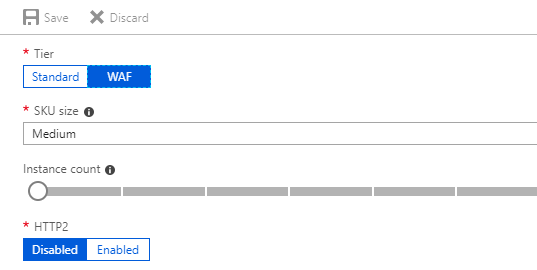
Step 2:
- After clicking on "Create" you will see the following window
- Enter name of WAF
- Select "Tier" to "WAF"
- Select "SKU Size" to "Medium" or "Large"(Depends on size of your Application)
(for more information visit "https://docs.microsoft.com/en-us/azure/application-gateway/application-gateway-introduction#gateway-sizes-and-instances")
- Select Instance size to 1
- Fill rest of the information and hit "OK"
Step 3:
- Create New Virtual Network
- Select Virtual Network -> Create New ->OK
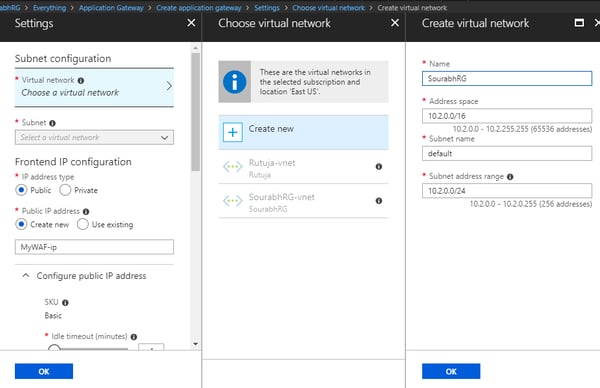
- Select Configuration as shown below:
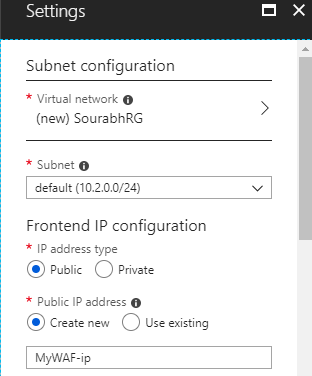
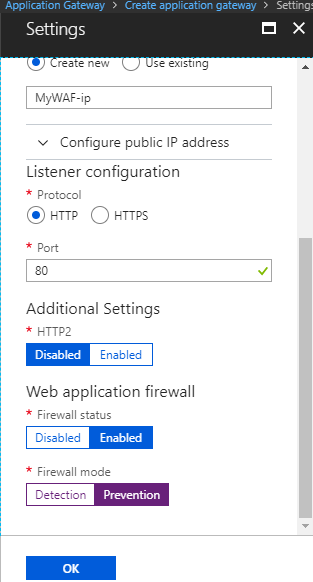
- Select Protocol "HTTP" and Port "80"
- Keep Firewall Status "Enabled"
- Keep Firewall Mode "Prevention" and hit "OK"
- Web Application Firewall is created as of now, further we need to configure it according to our application requirement
- WAF is deployed within 15 to 20 mins of time range
Step 4:
Following are the options we will be looking at
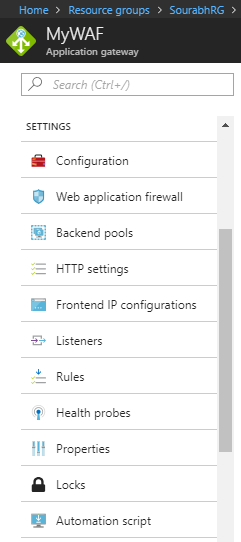
Configuration:
Web Application Firewall:
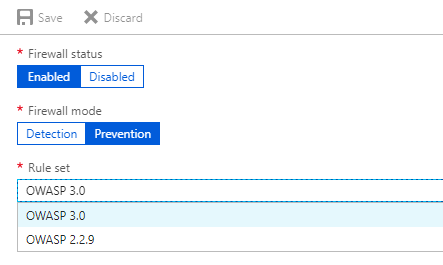
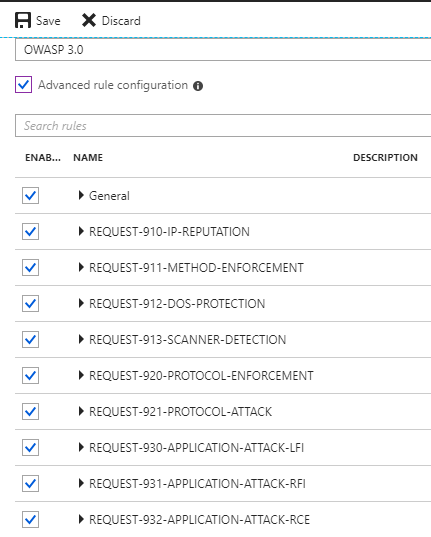
In this section we can change Firewall mode as per the requirement, Rule set "OWASP 3.0" is recommended.
Further we can "select / deselect" rules according to our application using "Advanced Rule Configuration".
 Step 5:
Backend Pools
There are several options in backend pool of WAF,
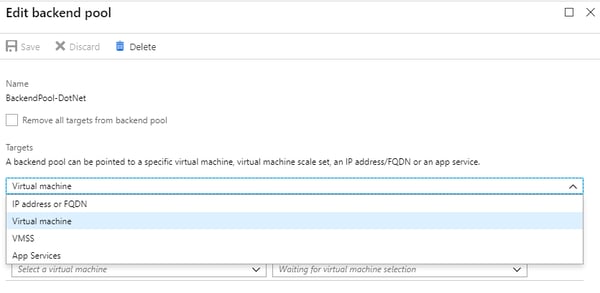 We consider a Virtual Machine for this tutorial where you want to send all the request to.
Note: VMs must be in the same VNET where you deployed WAF.
After selecting VM click "Save".
Step 6:
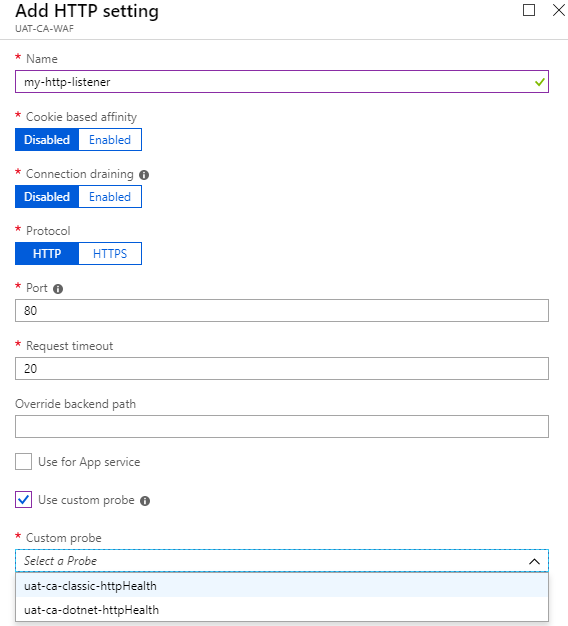
HTTP Settings
Add HTTP Setting
 We can add add Https Setting as above.
Step 7:
Listeners (Http and https)
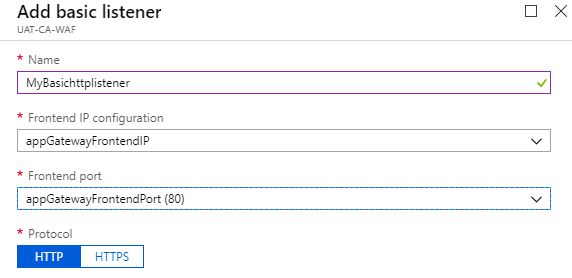
There are 2 types of Listeners "Basic" and "Multi-site"
Basic – You need to use basic listeners if you want to receive all the requests from web on the listener
- Click on "Listeners"
- Add Basic Listener
- Click "Ok"
 In the same way, if you need to create HTTPS listener
- Click on "Listeners"
- Add Basic Listener
- Click "Ok"
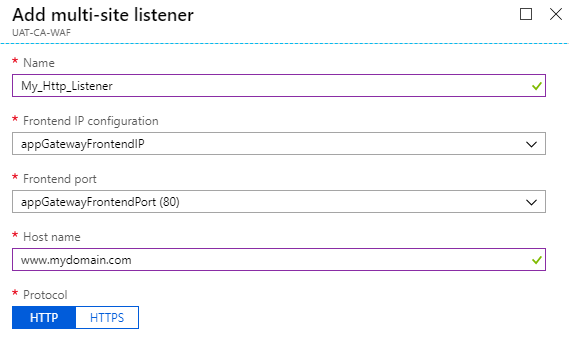
Multi-Site – You need to use Multi-Site listener to listen to a particuler hostname for example "www.mydomain.com".
- Click on "Listeners"
- Add Multi-Site listener
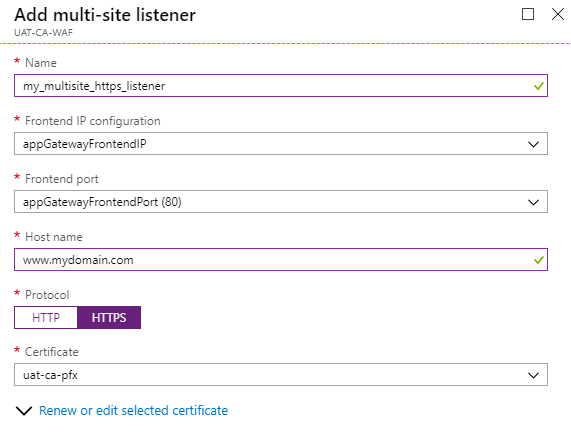
 In the same way, you can create HTTPS listener
- Click on "Listeners"
- Add MultiSite Listener
 Step 8:
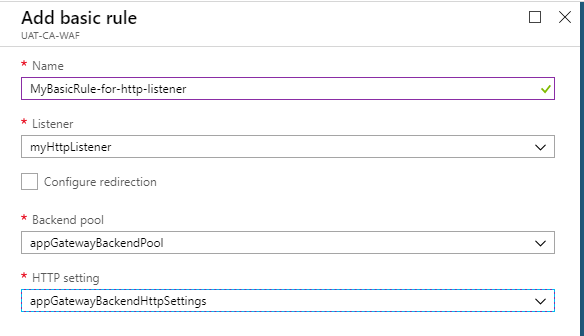
- Click Rules
- Add Basic Rule
- Enter basic information
- Select your earliar created listener from the Listener lists
- Select Backend pool where you want to send the request
- Select Http settings as per request i.e http settings for http request & https settings for https requests
- Click Ok
In the same way assign Rule for all the listeners.
 Step 9:
Health Probes
Health probes are to ping your host and check if Backend is online or not. You can create a custom health probe by following these steps.- Click on Health Probes
- Add
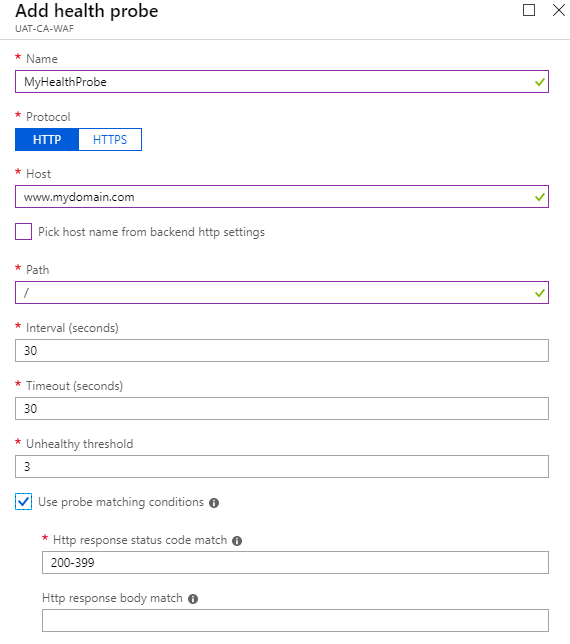
After adding a health Probe you need to assign that Health Probe to a HTTP Setting
Step 10:
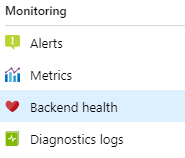
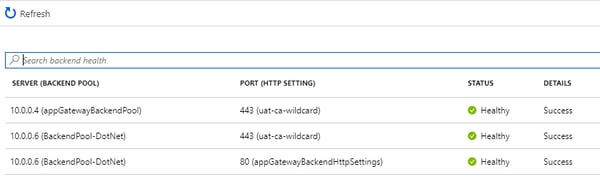
Backend Health
Backend health should be healthy to run all the websites/web application smoothly. If backend is unhealthy, check your health probes configured properly.
Testing Your Deployement:
Step 1:
Point your domain e.g "www.abc.com" to WAF Public IP address or use WAF public IP in URL to access the site.
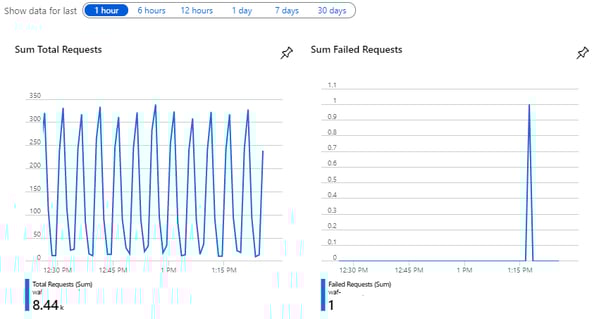
Step 2:
Check the flow of request through WAF by clicking on "Overview" of WAF blade.
Conclusion:
Microsoft Web Application Firewall solution is more effective at preventing malicious attacks on your web applications.
Combination of WAF with robust application coding makes web application more secured.
Besides protection, Web Application Firewall provides more functions such as logging attacks, load balancing, permanent redirections that further enhance website performance, security and reliability.


.png)