This blog describes how to connect Web App with Virtual Network. This integration allows your WebApp to get access to all resources in your virtual network. However, integrating Virtual Network with WebApp do not grant private access to your WebApp from the Virtual Network (VNet).
- Virtual Network with point to site
- Available Address Spaces
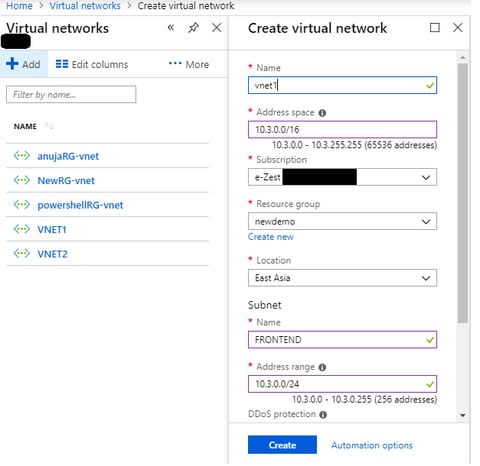
Creating Virtual Network:
In Azure portal
- Click +. Search for "Virtual Network" or “VNet”
- Select Virtual Network
- Fill all details & click on Create
 Adding Gateway Subnet
- After creating your Vnet “vnet1”, click on Subnets to get all the subnets present in this particular selected Vnet.
- On Subnet page, click on “Gateway subnets” to open add subnet page
 3.Name is auto filled with 'Gateway Subnet'. You can adjust the Address range values as per your required configuration
4.. Click on “OK” to create
Creating the Virtual Network Gateway
- Search 'Virtual Network Gateway' in all resources find and click on “Virtual network gateway”
- Fill the details and click on create to proceed
- Please refer to the image below
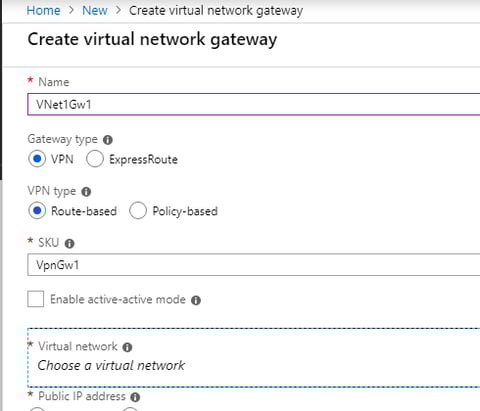
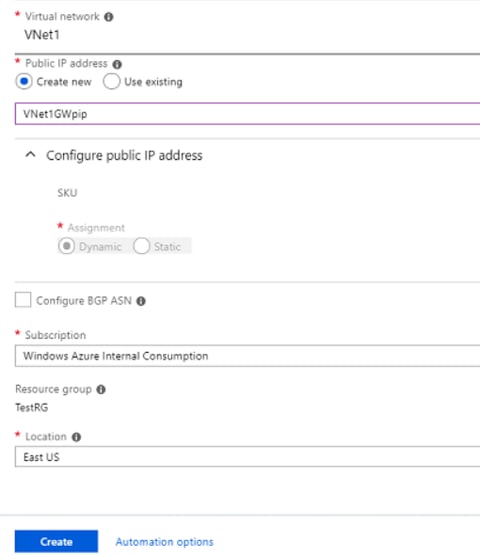
- After filling details, click on “Create” to deploy the VPN gateway
- This may take around 30 to 45 minutes to deploy
- Search for 'Web App' in all resources search bar
- Click on “+ Create”
- Fill the details for your Web App as mentioned below in an image
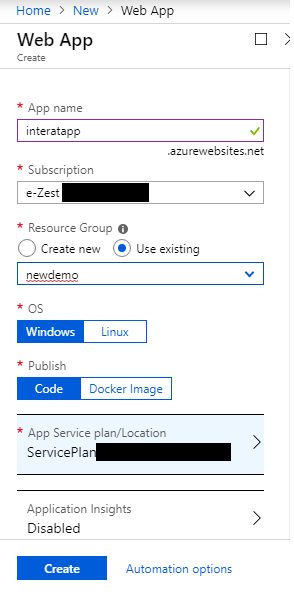
- Click on “Create” to deploy Web App
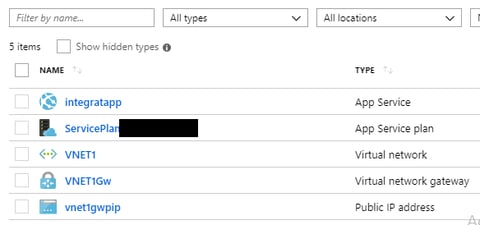
- Once the deployment is done you can check your WebApp in your resource group
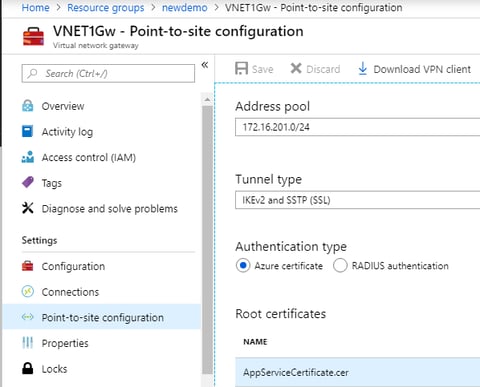
 Adding client address pool
- Navigate to “Point-to-site configuration”
- It is the address pool range of private IPs that is specified here. Whoever connects over the point-to-site VPN will dynamically have an IP from the ranges you mentioned in the address pool
- Make sure you use different non overlapping IP addresses to your on-premise or Vnet addresses
- You can select tunnel type “IKEv2”. Windows clients work on IKEv2 first and if this do not connect you can use “SSTP”
- You can use one or all tunnel types by clicking on all check boxes
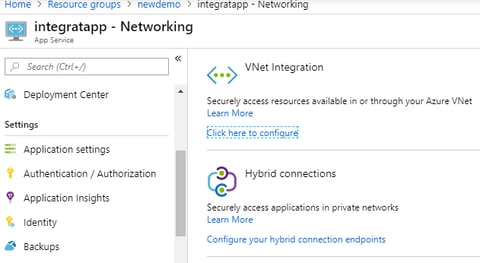
Configuring the created VNet with your WebApp:
- Navigate to your resource group
- Click on you created WebApp “newdemo”
- Select Add Vnet
- Click on Vnet Integration. Click on “Click here to configure”
- Select your Vnet
Once your connection is done it will show as below:
 Disconnecting VNet
- To disconnect your WebApp from the VNet, click on “Disconnect”
- This will disconnect your WebApp from Vnet
- Make a note that your WebApp will restart after disconnection with VNet causing downtime
Conclusion
Integrating WebApp with Vnet allows you to use the service endpoints. To use service endpoints with your created WebApp, you can use new VNet integration and connect to a selected VNet. Once done, configure the service endpoints on your Subnet you use for integration.