As we know that SQL server is primarily used in a majority of Windows based systems worldwide. Due to its robust nature, it was a preferred database to be used in major applications and their frameworks capitulating the opponents. Majorly it did not provide support towards Linux based operating systems.
Thereafter taking into consideration this point, Microsoft announced a launch of SQL Server 2017. With this launch, Microsoft effectively resolved the complications arising from the previous module of the application. It could now be run on Linux operating system.
Additionally, SQL Server 2017 images on Linux and Windows are now available in Azure Marketplace!
Why run SQL Server on an Azure Virtual Machine?
SQL Server 2017 is the first release which is available on Linux. In addition to Windows where there are choices of running SQL Server on virtual machines based on Linux, Red Hat Enterprise Linux, SUSE Enterprise Linux Sever and Ubuntu.
There are some advantages of running SQL Server in Azure:
Cloud flexibility
Tuned for performance
Hybrid connectivity
Highly-secured and trusted application
How to configure SQL Server on Ubuntu Server?
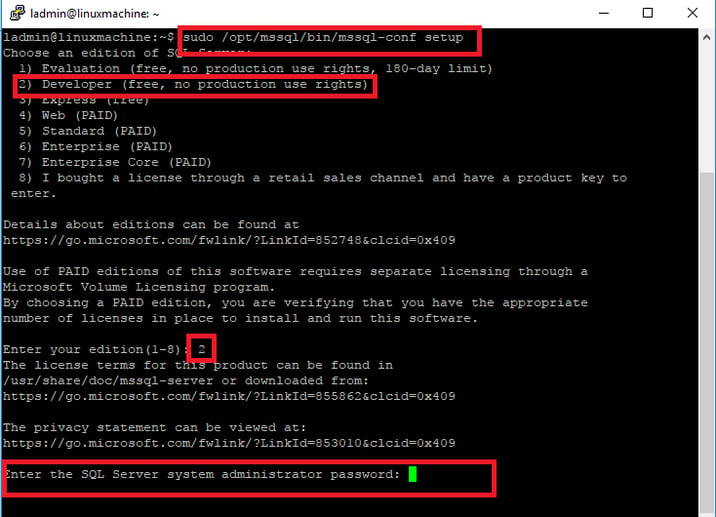
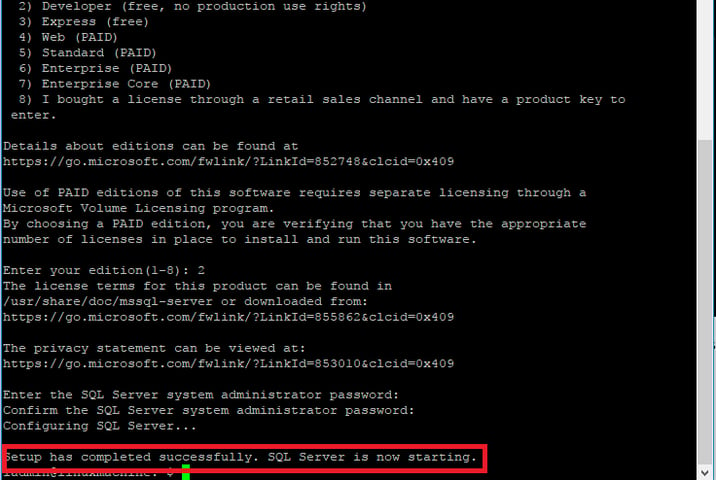
For configuration of the SQL Server on Ubuntu first we need to setup a virtual machine. This is easy. Use the Azure Portal and create a virtual machine using SQL Server 2017 Developer on Ubuntu Server image. For this blog I have used Ubuntu Linux but you can use Red Hat or Suse Linux as well.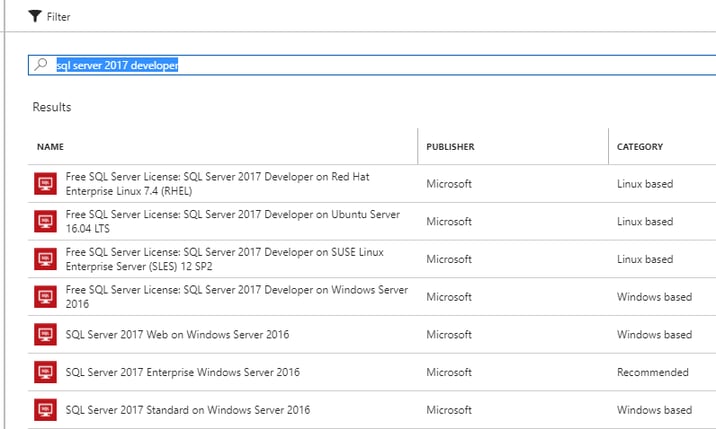
After successfully creating the VM, we need to change network Firewall settings to allow external access to MSSQL Service and for this we should add the inbound and outbound security rule.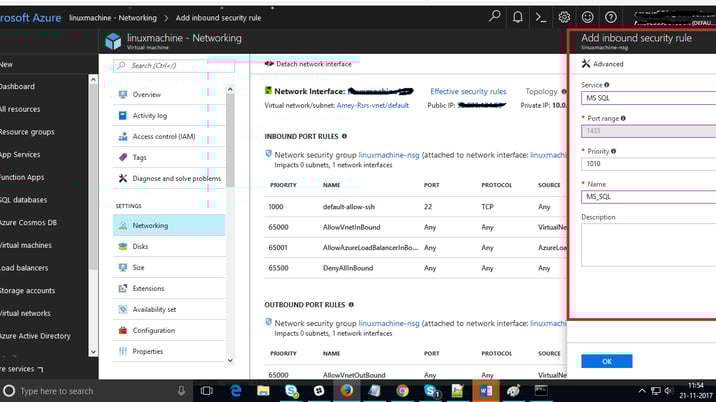

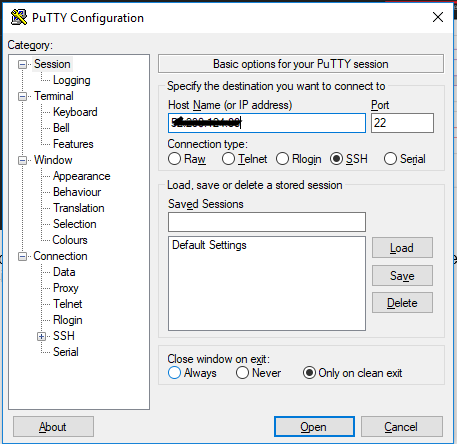
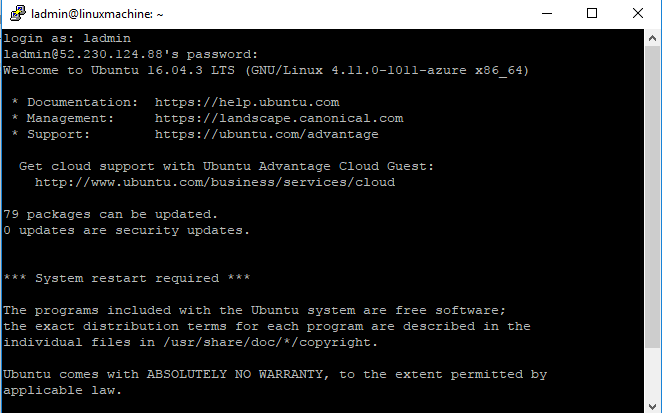
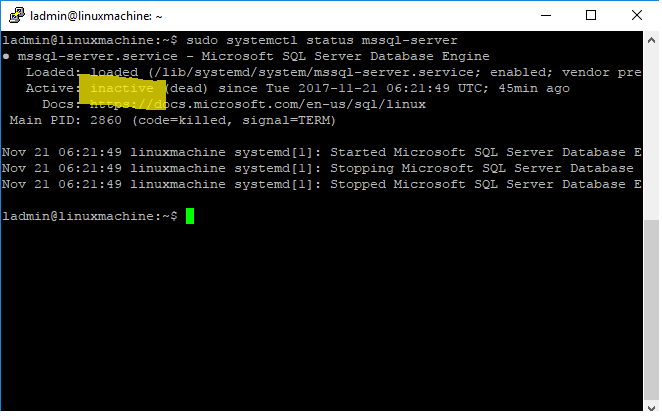
After entering into the VM your journey starts with Linux commands. Run the below commands to check the status of SQL Server.
- sudo su
- sudo systemctl status mssql-server
- sudo systemctl status mssql-server
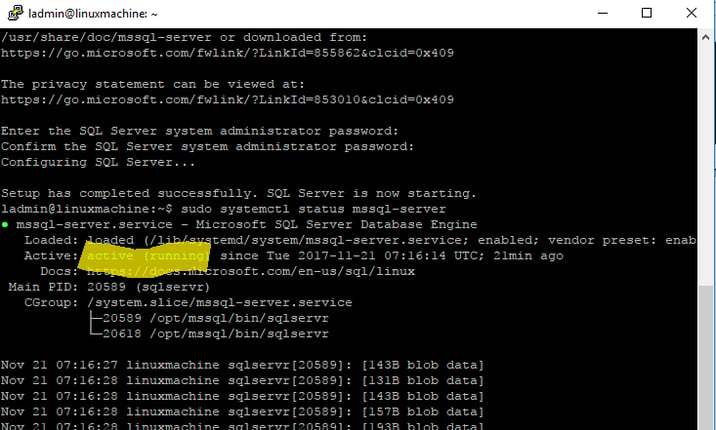
Now we are ready with the running SQL Server.
Run SQLCMD utility to connect SQL Server and Server version
- sqlcmd -S localhost -U sa -P ************
In this command put username sa and your password after -P to run the command.
Note - If you are facing this error line then follow these steps,
sqlcmd: command not found
Steps-
1) sudo su ”
// make sure that have mssql-tools installed
2) sudo apt-get install mssql-tools
3) ls /opt/mssql-tools/bin/sqlcmd*
// After you get the name of the tool you can create a symlink.
4) ln -sfn /opt/mssql-tools/bin/sqlcmd /usr/bin/sqlcmd
Run “ SELECT @@VERSION ” to see SQL Server version and after clicking “enter” run “GO” command and to terminate the operation press ctrl + c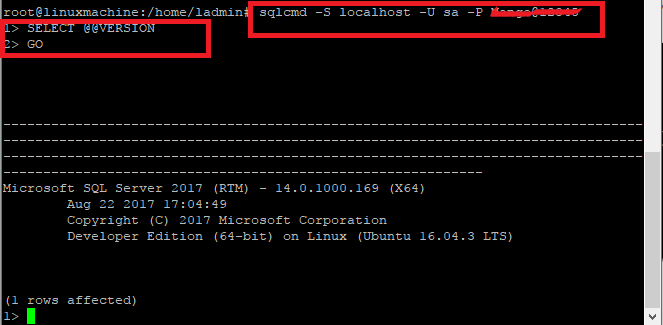
Now connect using SQL Server Management Studio 2017 and for connection use VM’s Public IP Address for servername and to log in use “SA” as the username and previously provisioned password.
Note: SSMS 2014 version is not supported to design database diagrams or tables.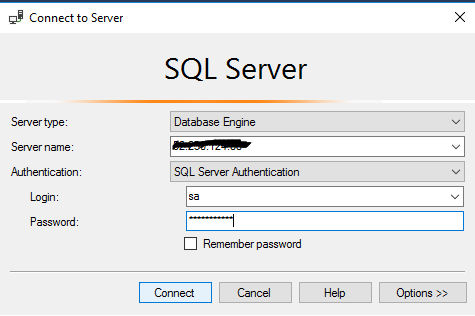
After this successful connection you are free to create databases, database objects, and tables.
Also you can take backup and restore using the Linux commands as there is no need to take this manually.
For taking backup of the database use the following command
sqlcmd -S localhost -U SA -Q "BACKUP DATABASE [your db name] TO DISK = N'/var/opt/mssql/data/*****.bak'"
***** - Replace your bak file name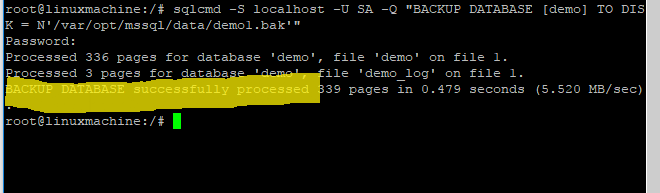
After taking backup successfully you can check the backup file “ /var/opt/mssql/data “ folder
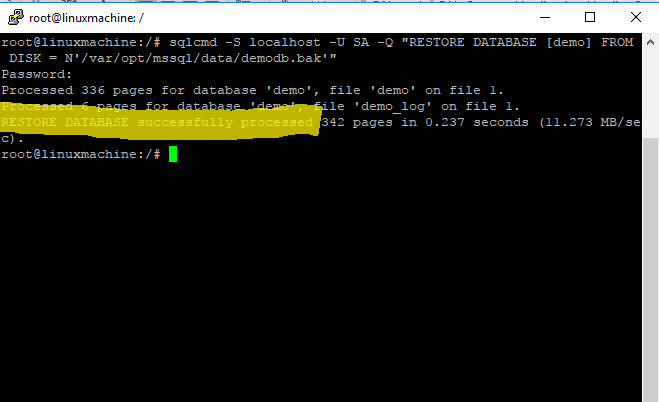
- For Restore of the database use the following command
Note- ***** - Replace your bak file name
Summary
As a conclusion, we cannot say that SQL Server is only supported on Windows platform but Microsoft has made life of the Linux developers simpler who wish to use SQL as the database by keeping the options to use SQL Server to work on the open source platform.