Introduction:
Use of containers for deploying applications and micro-services has been a common practice widely. Orchestration of these containers, managing their availability and scaling is a difficult task. This can be achieved using Kubernetes.
You can install Kubernetes on Ubuntu 16.04 VMs launched in Oracle VirtualBox environment by following the below step-by-step guide. After the installation is complete, deploy a simple Nginx webserver in the Kubernetes cluster. Below is the low-down on installing Kubernetes on Ubuntu 16.04 VMs.
Pre-requisites:
- Kubernetes Master:
- 2 GB or more of RAM
- 2 or more CPUs
- Kubernetes Node:
- 1 GB or more of RAM
- 1 or more CPU
- Full network connectivity between all machines in the cluster:
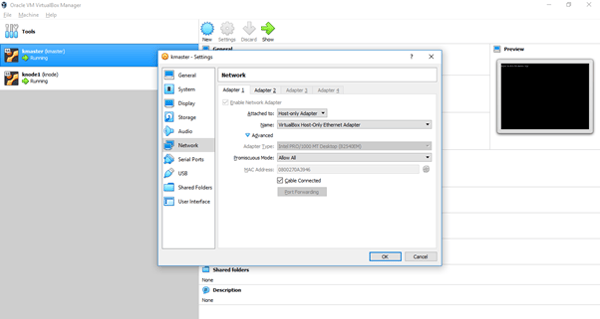
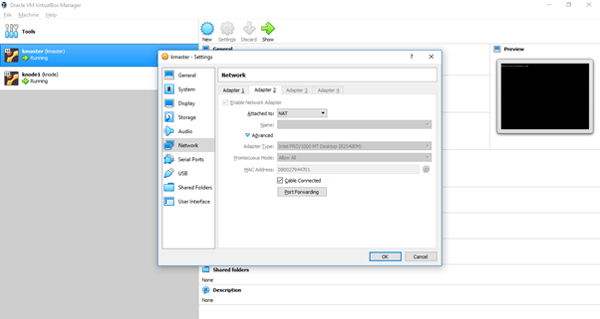
Within the VirtualBox environment, following changes were made so that the two VMs can communicate with each other:- For both the Master and Node VM, update the Network Adapter to use the host-only adapter (for VM to VM communication) and NAT Adapter (for connectivity to internet for downloading packages and pull updates).
Note: Make sure the Promiscuous Mode is set to allow all.
- For both the Master and Node VM, update the Network Adapter to use the host-only adapter (for VM to VM communication) and NAT Adapter (for connectivity to internet for downloading packages and pull updates).
-
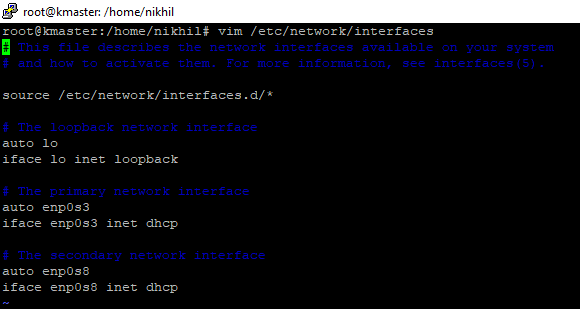
- We also need to update the configuration on both the Master and Node server so that it uses the Adapter 2 set as NAT for accessing internet on the system. Edit file /etc/network/interfaces and add the information of the Adapter 2 (can be obtained using command: “ip link” on Ubuntu) as shown in the screenshot below:
- Unique hostname, MAC address, and product_uuid for every node
- Verify unique MAC address:
ifconfig -a - product_uuid:
sudo cat /sys/class/dmi/id/product_uuid
- Verify unique MAC address:
- Swap disabled. You must disable swap in order for the kubelet to work properly
Installation:
a) Docker:
- Install Docker CE
- Set up the repository and Install packages to allow apt to use a repository over HTTPS:
apt-get update && apt-get install apt-transport-https ca-certificates curl software-properties-common - Add Docker’s official GPG key:
curl -fsSL https://download.docker.com/linux/ubuntu/gpg | apt-key add - - Add Docker apt repository:
add-apt-repository \
"deb [arch=amd64] https://download.docker.com/linux/ubuntu \
$(lsb_release -cs) \
stable" - Install Docker CE:
apt-get update && apt-get install docker-ce=18.06.2~ce~3-0~ubuntu - Setup daemon:
cat > /etc/docker/daemon.json <<EOF
{
"exec-opts": ["native.cgroupdriver=systemd"],
"log-driver": "json-file",
"log-opts": {
"max-size": "100m"
},
"storage-driver": "overlay2"
}
EOF
mkdir -p /etc/systemd/system/docker.service.d
- Set up the repository and Install packages to allow apt to use a repository over HTTPS:
- Restart docker:
systemctl daemon-reload
systemctl restart docker
b) Kubernetes:
- Installing kubeadm, kubelet and kubectl:
apt-get update && apt-get install -y apt-transport-https curl
curl -s https://packages.cloud.google.com/apt/doc/apt-key.gpg | apt-key add -
cat <<EOF >/etc/apt/sources.list.d/kubernetes.list
deb https://apt.kubernetes.io/ kubernetes-xenial main - EOF
apt-get update
apt-get install -y kubelet kubeadm kubectl
apt-mark hold kubelet kubeadm kubectl - Start service:
systemctl daemon-reload
systemctl restart kubelet - Initialize Cluster: (make sure swap is disabled and server has minimum 2 CPUs)
kubeadm init --apiserver-advertise-address=192.168.56.102 --pod-network-cidr=10.7.0.0/16
- To start using cluster, execute below commands as non-root user which are obtained from the result of previous command:
mkdir -p $HOME/.kube
sudo cp -i /etc/kubernetes/admin.conf $HOME/.kube/config
sudo chown $(id -u):$(id -g) $HOME/.kube/config - On the non-master node, run the following command so that it joins the cluster:
kubeadm join 192.168.56.102:6443 --token 7ccqu5.vgm0tmuw1blofmca \
--discovery-token-ca-cert-hash sha256:554ebad7fa7aec3c8cf827f99b7effed8e55c8ef0e7284cb851bdbe1c21dfc65 - We can check the status of the Nodes and Pods by issuing following command:
kubectl get pods -o wide --all-namespaces
kubectl get nodes --all-namespaces - It can be noted that the Nodes are in “Not Ready” state and the CoreDNS pod will not start up. Thus, to get this up, the network must be deployed before deployment of any other applications.
We will use Flannel to setup the network:
Download the Flannel configuration file and update the net-conf.json section with the IP address used for initialization of Kubernetes cluster:
wget https://raw.githubusercontent.com/coreos/flannel/62e44c867a2846fefb68bd5f178daf4da3095ccb/Documentation/kube-flannel.yml
vim kube-flannel.yaml
- Apply the configuration:
kubectl apply -f kube-flannel.yml - Check status and note that all the pods are in Running state and all the nodes are in Ready state:
kubectl get pods -o wide --all-namespaces
kubectl get nodes --all-namespaces
Running an application in the cluster:
- Run following commands to deploy Nginx image within the Kubernetes cluster:
kubectl create deployment nginx --image=nginx
kubectl expose deploy nginx --port 80 --target-port 80 --type NodePort
kubectl get services - Check the node on which the pod is deployed and then test the deployment using that node’s host IP address: (http://ip:nginx_port)
# get node
kubectl get pods -o wide --all-namespaces
# get the port number
kubectl get services


