Some of the benefits offered by Apache Ambari can be summed up as below:
- Ambari provides a simple and attractive Web UI which helps in automating the cluster activities
- It simplifies the installation, management and configurations of all the services
- It simplifies the security and administration of all the services
- It monitors the cluster and provides a full visibility of the cluster
Minimum Requirement
Memory: Minimum 1GB (1024 MB) free for up to 10 hosts
Disk Size: Minimum 10GB
Software Requirement: Python 2.7.x and JDK 1.8.x
Note: If JDK is not installed then Ambari takes care of installing it while installing itself.
Installing Ambari on Ubuntu
Considering 2 hosts:
1.1.1.1 Acting as Ambari Server
2.2.2.2 Acting as Ambari Agent1
Make the following entry in /etc/hosts file of all the 2 hosts
2.2.2.2 node1
Download the Ambari repository file to a directory on your installation hosts (Do this on all the servers).
Use the below command on both the servers:
wget -O /etc/apt/sources.list.d/ambari.list http://public-repo-1.hortonworks.com/ambari/ubuntu16/2.x/updates//ambari.list
apt-key adv --recv-keys --keyserver keyserver.ubuntu.com B9733A7A07513CAD
apt-get update
Confirm that Ambari packages downloaded successfully by checking the package name list.
apt-cache showpkg ambari-server
apt-cache showpkg ambari-agent
apt-cache showpkg ambari-metrics-assembly
On the master node i.e the one going to act as ambari-server.
Now install ambari-server. This also installs the default PostgreSQL Ambari database.
apt-get install ambari-server
Before starting the ambari-server, we must setup Ambari. The setup configures installs and configures PostgreSQL Ambari database also installs JDK.
Run the following command on master node
ambari-server setup
While setting up Ambari the following are the questions and their responses
- If you have not temporarily disabled SELinux, you may get a warning. Accept the default (y), and continue.
- Customize user account for ambari-server daemon prompt: ambari by default runs on root . If you want to configure it on root the select (n). If you want another user then select (y). If you select (y) then provide a username.
- Warning for disabling iptables: If you have not disabled it you may get a warning, so select (y).
- Select a JDK version. Select (1) to install JDK 1.8. If you select to choose the custom version of JDK then you must install JDK manually on all the servers and specify the Java_Home_Path.
- Note: Choosing option 1 would be good as it saves a lot of manual configurations and it makes the necessary configurations on its own related to Ambari.
- Accept the Oracle JDK license when prompted.
- To explicitly enable Ambari to install libraries related to LZO data compression, select (y). If you select (n) then Ambari will not install any libraries automatically on newly added hosts.
- Enter advanced database configuration: Select (n) to use the default, embedded PostgreSQL database. The default database name is Ambari. Its default username is ambari and password is bigdata. If you want to use an existing database of MySQL/MariaDB/Oracle/PostgreSQL the select (y)
- Proceed with configuring remote database connection properties [y/n]: y.
- Setup completes.
After the setup start the server using following command prompt command.
ambari-server start
Setup ambari-agent on both the servers
Run the following command on both server
apt-get install ambari-agent
Edit the ambari-agent.ini file on both the servers.
vi /etc/ambari-agent/conf/ambari-agent.ini
[server]
hostname=<your.ambari.server.hostname>
url_port=8440
secured_url_port=8441
On master-node change the value of hostname to localhost.
On node1 change the value of hostname to master-node.
Start the ambari-agent.
ambari-agent start
Ambari Server Web UI listens on 8080, it is accessible as:
http://<ambari-server-ip-address>:8080
It will ask for login username and password the default credentials are admin/admin.
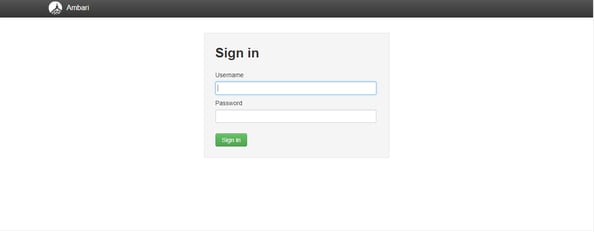 Login Page
Launch the Ambari Cluster Install Wizard
From the login page you will be redirected to the Launch the Ambari Cluster Install Wizard page.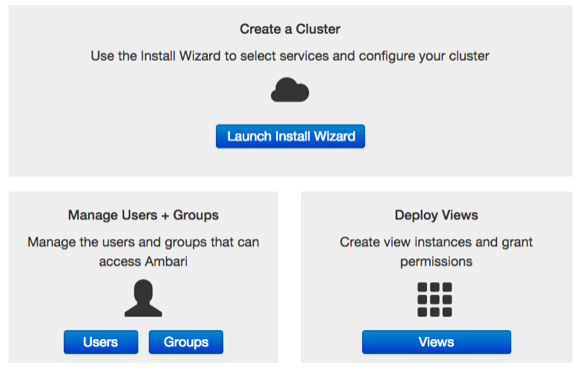 Launch Install Wizard
After this you will be redirected to the Name your Cluster page.
In ‘name your cluster’ field provide a name to the cluster. Remember that the name should not contain any special characters or white spaces.
Choose Next.
Select Version:
During this step you will select the software version and method for the cluster. There are two ways to do this
- Using Public Repository: This will require internet connection to the server.
- Using Local Repository: Requires software configured in a repository within a network.
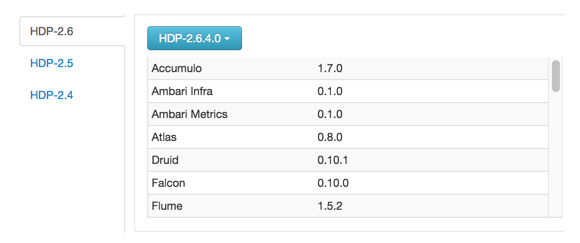 Select Stack Version
If Ambari Server has access to the internet specific versions will be listed in the DropDown.
If you have a Version Definition File for a version that is not listed, you can click Add Version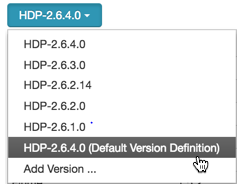
You can edit the base URL of the repositories based on the OS. BaseURL based on OS
Skip Repository Base URL validation (Advanced): If you click next then it will validate if the BaseURL is valid or not
Use RedHat Satellite/Spacewalk: This option will be valid only if the local repository setting is used.
Install Option
- In Target Host: Enter the list of hosts one per line.
- If you want Ambari to automatically install the Ambari agent provide the SSH ppk or path or choose select file in Host Registration Information.
- Provide username and password for the SSH key.
- If you want to install Ambari Agent manually, select Perform Manual Registration: This step will require Ambari agent installed. We have already installed and setup ambari-agent above in the article.
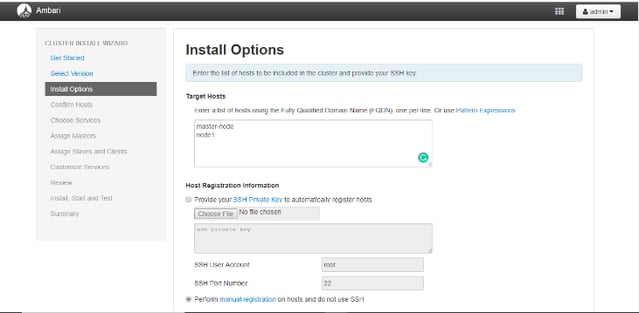
Install Option
- Choose Register and Confirm.
If you select to install Ambari Agent manually then it throws the below exception

Click OK.
If all the hosts are correctly configured the Confirm Host page will successfully register the hosts.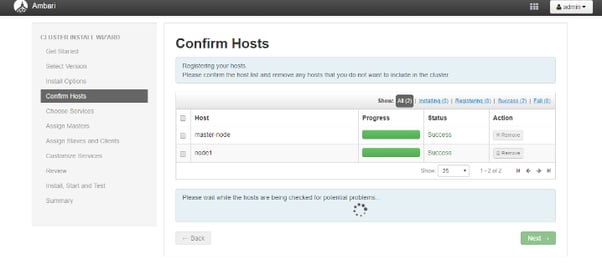 Confirm Hosts
It may show few warnings for host checks.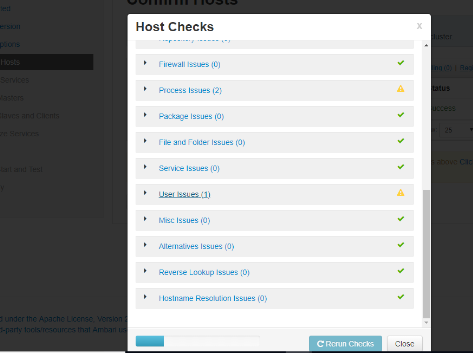 Warning in Host Health Check
The solutions for the warnings is given right there. If you resolve it then you can do a Rescan
Choose Services.
Based on the Stack chosen during the select stack step you are offered with the choice of services that you want to be installed through Ambari.
You can install/select the services now of add the services later as well.
Starting in Ambari 2.5, SmartSense deployment is mandatory. You cannot clear the option to install SmartSense using the Cluster Install wizard. SmartSense Deployment Mandatory
- Select the service you want to deploy and choose next.
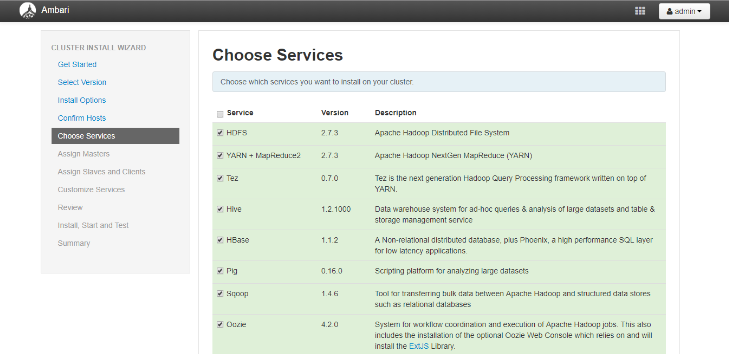 Choose Services
After you select the services to be installed it asks us to verify the configurations and assign master and slaves.
If you select to create the HDFS cluster with YARN+MapReduce then it will ask the hostname for NodeName SecondaryNameNode and DataNode. It does the configurations according to the inputs provided by you.
The following are the snapshots that indicate the configuration details.
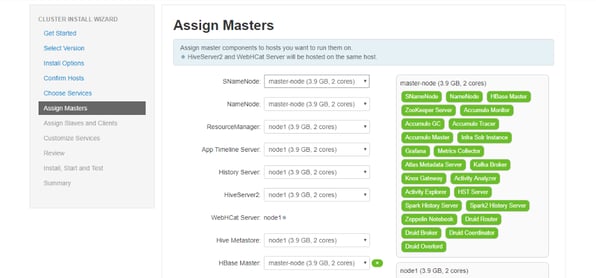 Step: Assign Masters: Asking the Secondary NameNode, NameNode Details
 Step: Assign Slaves and Client
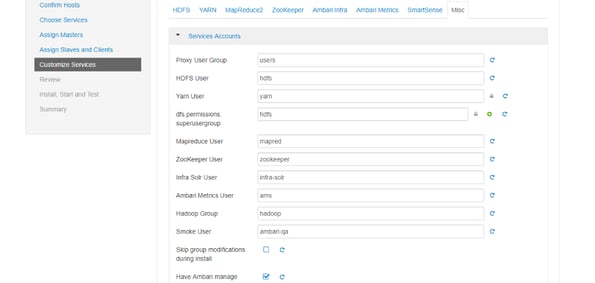 Step: Customize Service
 Review the settings
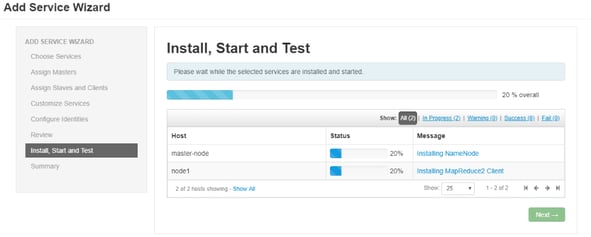
Step: Install Start and Test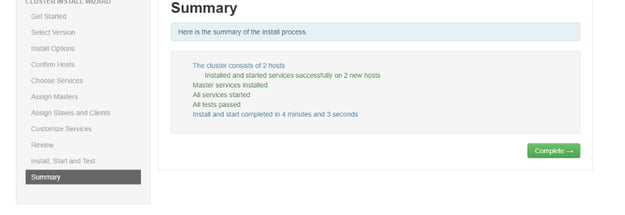
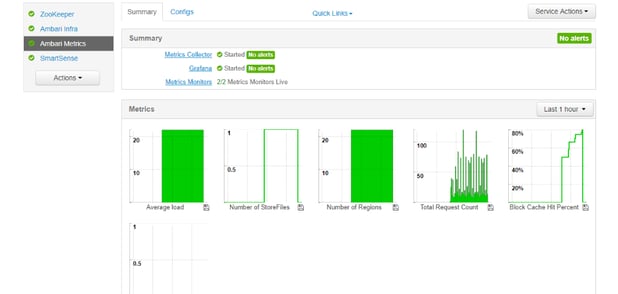
Summary of all the Services installed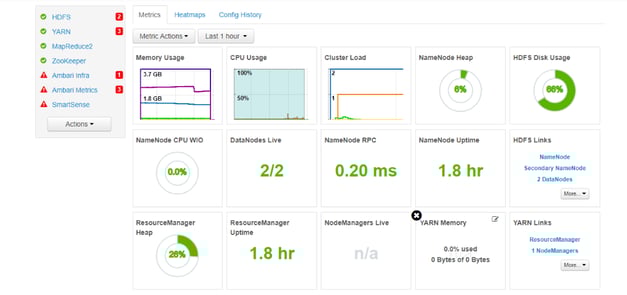
Step: Monitoring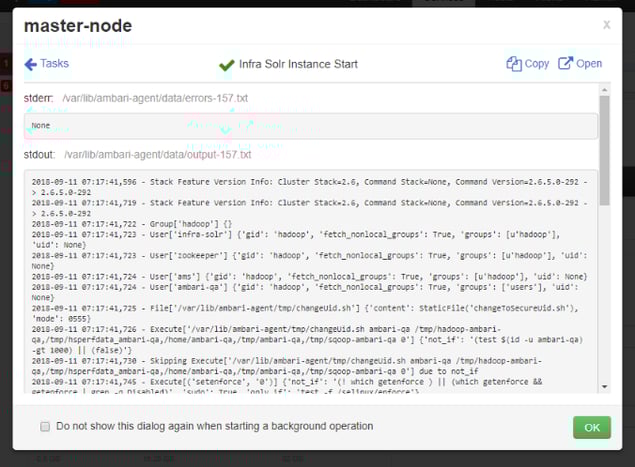
Logs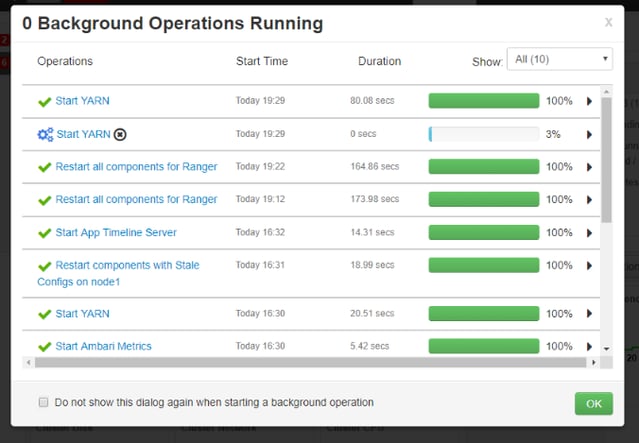
Starting and Stopping of Services