Magento has a lot of core functionalities that we can we use for our project requirements. One of them has Magento 2 EE providing the custom customer attribute with the different formats like Text, File, Image (via Dropdown or Multi-select) etc.
We can use the customer image custom attribute as per our requirement but that image attribute doesn’t have the default UI Component functionality like uploading product images.
In order to achieve that functionality for customer custom attribute, we can follow the below steps.
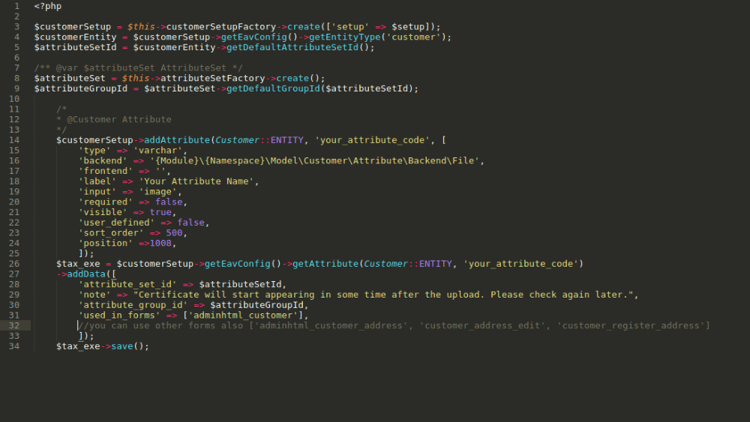
- First, we need to create the customer attribute using SQL setup script.
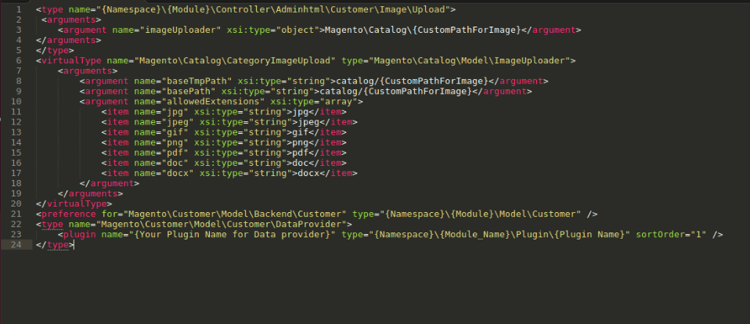
- Then we need to set the di.xml for upload image to server.
- Next, create routes.xml for controller action routing in admin.html
Create directory \etc\adminhtml\routes.xml file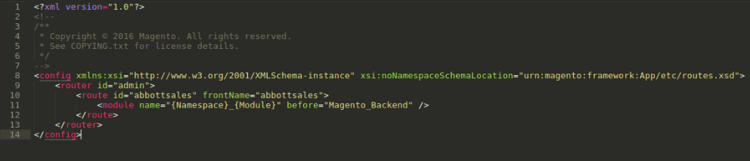
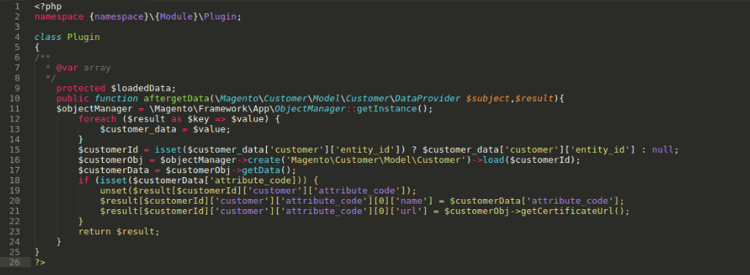
- Then, create plugin in to {Namespace\Module}\Plugin directory
Create file Plugin.php with below code
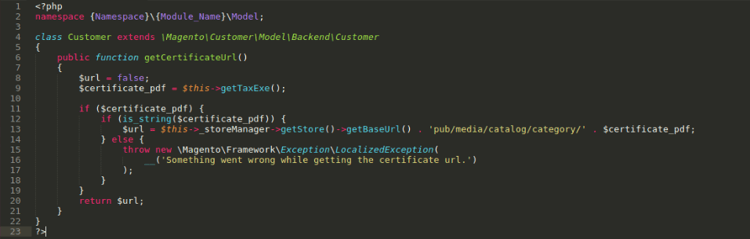
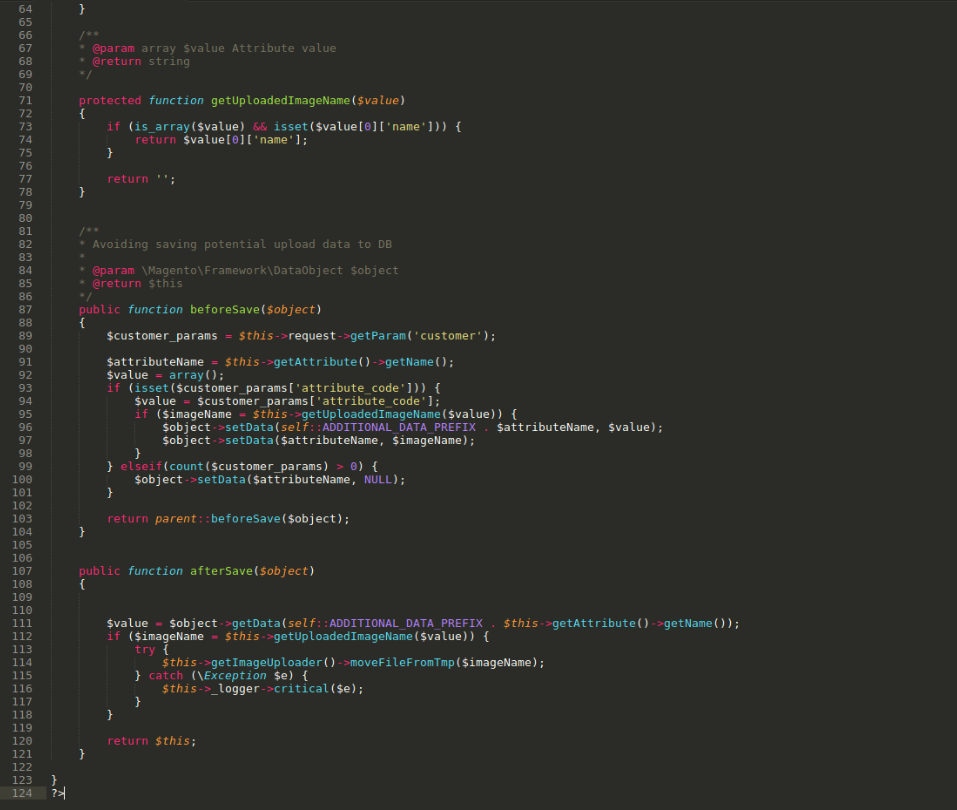
- The image Attribute requires us to create a backend model for the upload image.
Create customer.php model file under the Model directory.
- Then we need to create the directory structure for the backend mode.
{Namespace Name}\{Module_Name}\Model\Customer\Attribute\Backend
Under this directory create file File.php for Upload the attribute image.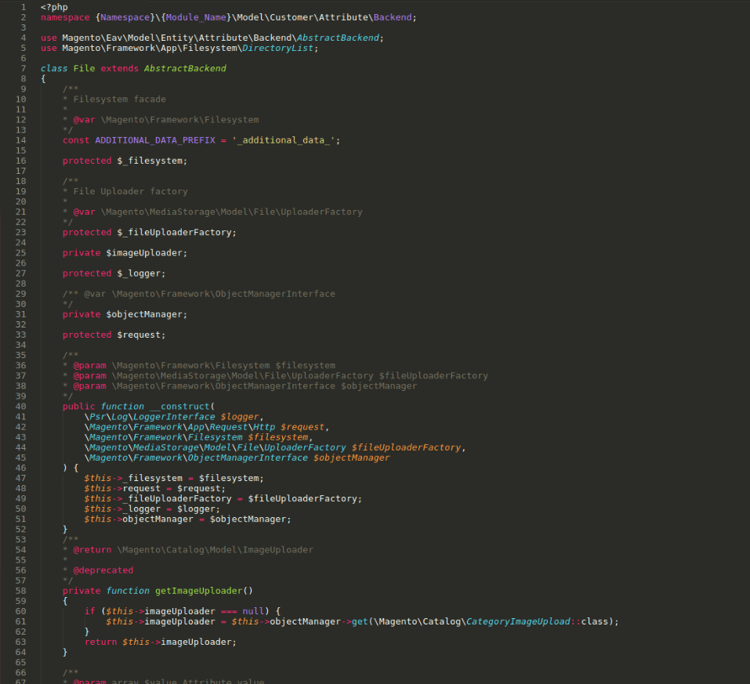
- Then, create the below controller for upload image action directory structure in your module.
{Namesapace}\{Module_Name}\Controller\Adminhtml\Customer\Image\
Create Upload.php action Image controller.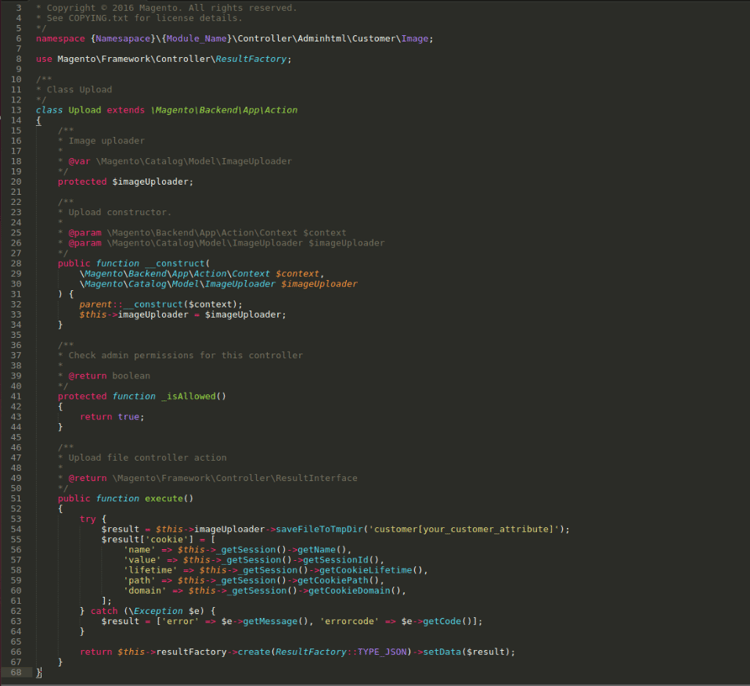
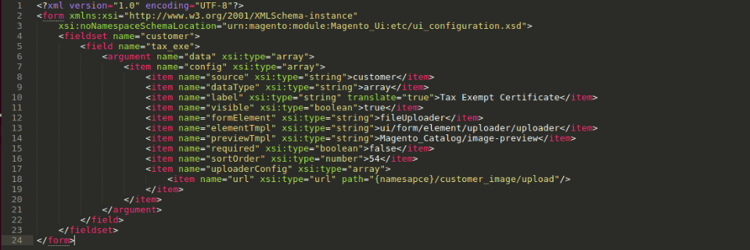
- Now need to create the UI component for the image attribute.
Under the View directory of your module, create below directory and files
view\adminhtml\ui_component\customer_form.xml.
- After creating all the files, run the below commands from Magento root.
rm -rf var/generation var/cache
php bin/magento setup:upgrade
php bin/magento setup:static-content:deploy
php bin/magento cache:flush
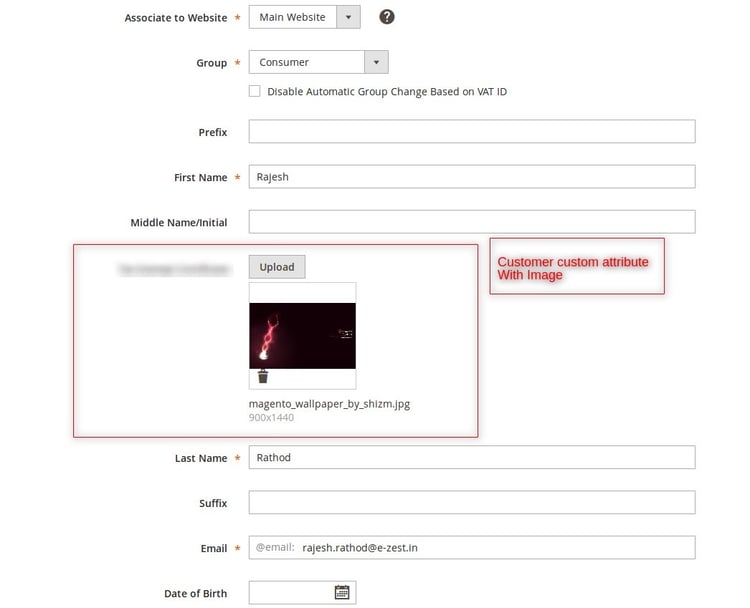
- Finally, go To Magento Customer section in Magento 2 admin. The UI Component with customer image attribute is working!