Google Tag Manager is a tag management system that allows you to quickly and easily update tags and code snippets on your website or mobile app such as those intended for traffic analysis and marketing optimization.
Using the tag manager you can also fire your specific tag according to trigger on your website.
You can add and update AdWords, Google Analytics, Firebase Analytics, Floodlight, and 3rd party or custom tags from the Tag Manager User interface instead of editing site code. This reduces errors and frees you from having to involve a developer when configuring tags.
We can create custom triggers based on different event like DOM Ready, Page View, Window loaded etc.
Working flow of GTM
You have to add a small code snippet on your website that is in the form of JavaScript code commonly placed on the head section of the webpage. That code connects your website with the tag manager server.
GTM in Magento
Magento provides dynamic code snippet by the configuration. It requires to add only GTM account container id into configuration and Magento will create dynamic GTM code snippet using that container id and placed on each and every page of the Magento website.
Why you need GTM in your website?
Google Tag Manager provides the ability to add tracking tags to your site to measure the audience, or to personalize, retarget, or conduct search engine marketing activities.
Google Tag Manager directly transfers data and events to Google Analytics, Enhanced e-commerce and other third-party analytics solutions, to produce a clear picture of how well your site, products, and promotions are performing.
Follow the below steps to get GTM configured in Magento 2
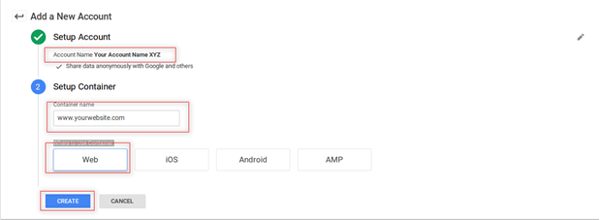
1. Create GTM account on (https://tagmanager.google.com) google and create account by click on CREATE ACCOUNT link.
Add the below required details
- Account Name: Your GTM Account Name
- Container Name: Your Website URL (www.yourwebsite.com)
- Where to use container: Select “Web” for the Magento 2 Application and click on the create button
2. Go To “WORK SPACE” and click on “New Tag” to create your website tag
Select Tag Type: Universal Analytics
You can select Trigger as per website requirement in triggering section.
You can also add you Google Analytics UA - Id while configuring the Google Tag Manager. It will help to track analytic data to Google Analytics account. It is used for advanced e-commerce tracking including sales report in Google Analytics.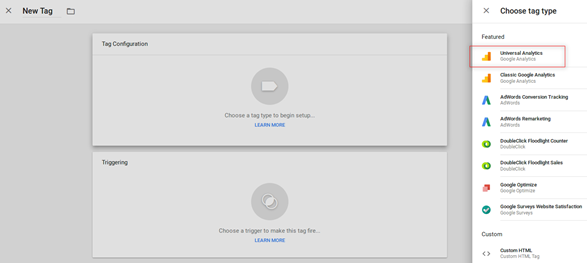
Select Tag Type: Universal Analytics
You can select Trigger as per website requirement in Triggering section
You can also add Google Analytics UA- Id while configuring the Google Tag Manager.
It will help to track analytic data to Google Analytics account.
It is used for Advance e-commerce tracking including sales report in Google Analytics.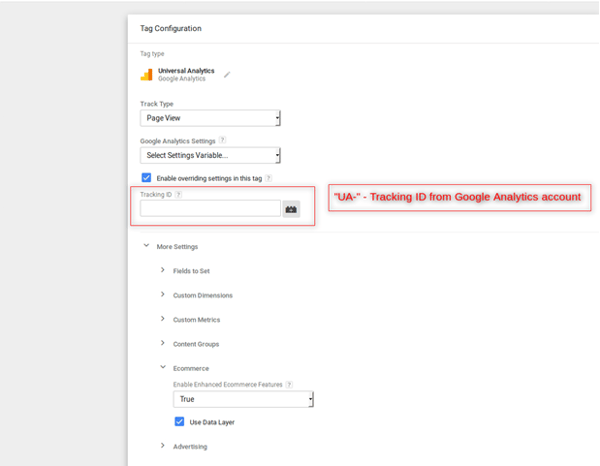
3. Go to your Magento 2 admin panel, go to stores => Configuration => Sales => Google API. And add GTM container id by selecting account type: Google Tag Manager and save the configuration.
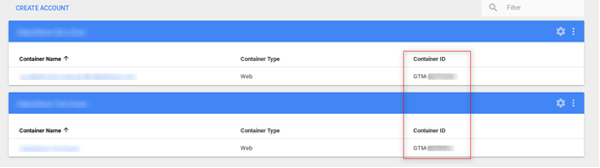
Find Container Id in GTM see below screen shot.
After created account in GTM you can find the container id in form of “GTM-XXXXX”
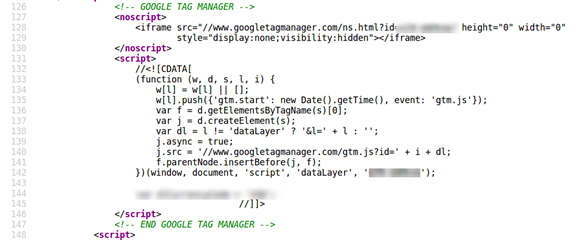
4. You can verify the GTM code by view you website page source, Go to your web browser and press Ctrl+U
Now your GTM setup is done
You can also setup Universal Google Analytics directly with the Magento 2 Website.
Enable GA (Google Analytics) in Magento
Go to Your Magento 2 Admin panel, Go to Stores => Configuration => Sales => Google API. And add you GA code by selecting Account Type: Universal Account and save the configuration.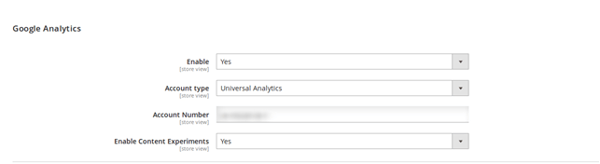
You can also verify the code using view page source of your website.
Create the GA account with Google and create your website account from more option => create account.
Enable the advance e-commerce setting from the GA account
Go to Administration => VIEW => Ecommerce Settings, Add below settings
Enable Ecommerce:
Status = On
Enable Related Products = On
Enhanced Ecommerce Settings
Enable Enhanced Ecommerce Reporting = On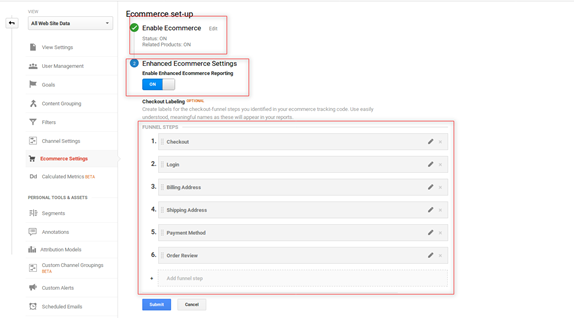
Checkout labelling, funnel steps as per your requirement. Click on submit button
Go To Account property User Management => Tracking Info => Tracking Code
You will see:
<!-- Global Site Tag (gtag.js) - Google Analytics -->
<script async src="https://www.googletagmanager.com/gtag/js?id=UA-XXXXXX-1"></script>
<script>
window.dataLayer = window.dataLayer || [];
function gtag(){dataLayer.push(arguments)};
gtag('js', new Date());
gtag('config', 'UA-XXXXXX-X');
</script>