In this blog I have used Angular RC1 latest upgraded version to implement unit testing using jasmine core.
Firstly, will explain how to create a simple application then will further continue to describe how to implement unit testing within the same application.
This blog should definitely help you get started on Angularjs 2 RC1.
- Open WebStrom application tool.
If you don’t have WebStorm installed download it from here https://www.jetbrains.com/webstorm/ - Create new project.
Click on File->New->Project
- Inside the project folder create a folder named wwwroot and select that folder to create new project.

- Right click wwwroot folder and add new json file named package.json.

- Copy paste below code into package.json file.
Note: we are using Angular 2.0 rc.1 version. (highlighted in green)
{
"name": "angular2_demo",
"version": "1.0.0",
"scripts": {
"start": "tsc && concurrently \"npm run tsc:w\" \"npm run lite\" ",
"lite": "lite-server",
"postinstall": "typings install",
"tsc": "tsc",
"tsc:w": "tsc -w",
"typings": "typings"
},
"license": "ISC",
"dependencies": {
"@angular/common": "2.0.0-rc.1",
"@angular/compiler": "2.0.0-rc.1",
"@angular/core": "2.0.0-rc.1",
"@angular/http": "2.0.0-rc.1",
"@angular/platform-browser": "2.0.0-rc.1",
"@angular/platform-browser-dynamic": "2.0.0-rc.1",
"@angular/router": "2.0.0-rc.1",
"@angular/router-deprecated": "2.0.0-rc.1",
"@angular/upgrade": "2.0.0-rc.1",
"systemjs": "0.19.27",
"core-js": "^2.4.0",
"reflect-metadata": "^0.1.3",
"rxjs": "5.0.0-beta.6",
"zone.js": "^0.6.12",
"angular2-in-memory-web-api": "0.0.10",
"bootstrap": "^3.3.6"
},
"devDependencies": {
"concurrently": "^2.0.0",
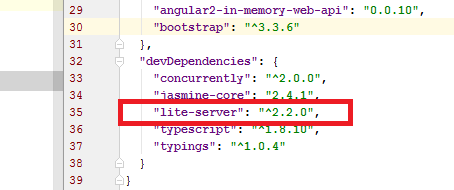
"lite-server": "^2.2.0",
"typescript": "^1.8.10",
"typings": "^1.0.4"
}
} -
Right click wwwroot folder and add new JavaScript file systemjs.config.js.

-
Copy paste below code in systemjs.config.js file.

(function(global) {
     // map tells the System loader where to look for things
     var map = {
         'app':                        'app', // 'dist',
         '@angular':                   'node_modules/@angular',
         'angular2-in-memory-web-api': 'node_modules/angular2-in-memory-web-api',
         'rxjs':                       'node_modules/rxjs'
     };
     // packages tells the System loader how to load when no filename and/or no extension
     var packages = {
         'app':                        { main: 'main.js',  defaultExtension: 'js' },
         'rxjs':                       { defaultExtension: 'js' },
         'angular2-in-memory-web-api': { main: 'index.js', defaultExtension: 'js' },
     };
     var ngPackageNames = [
         'common',
         'compiler',
         'core',
         'http',
         'platform-browser',
         'platform-browser-dynamic',
         'router',
         'router-deprecated',
         'upgrade',
     ];
     // Add package entries for angular packages
     ngPackageNames.forEach(function(pkgName) {
         packages['@angular/'+pkgName] = { main: pkgName + '.umd.js', defaultExtension: 'js' };
     });
     var config = {
         map: map,
         packages: packages
     }
     System.config(config);
})(this); -
Right click wwwroot folder and add new json file named as tsconfig.json.

-
Replace existing code with below code in tsconfig.json file.
{
   "compilerOptions": {
     "target": "es5",
     "module": "commonjs",
     "moduleResolution": "node",
     "sourceMap": true,
     "emitDecoratorMetadata": true,
     "experimentalDecorators": true,
     "removeComments": false,
     "noImplicitAny": true,
     "suppressImplicitAnyIndexErrors": true
   }
} -
Right click wwwroot folder and add new json typings.json.

-
Copy paste below code in typings.json file.

{
   "globalDependencies": {
     "core-js": "registry:dt/core-js#0.0.0+20160317120654",
     "jasmine": "registry:dt/jasmine#2.2.0+20160505161446",
     "node": "registry:dt/node#4.0.0+20160509154515"
   }
} -
Now open the Terminal and run command npm install.

This command will install all the packages mentioned in package.json file.
It will create a folder named node_modules and typings which will have all the packages downloaded inside it.
-
Right click wwwroot folder and add new html file named index.html.

-
Copy paste below code in index.html file.

<html>
 <head>
     <script>document.write('<base href="' + document.location + '" />');</script>
     <title>Angular 2 Demo</title>
     <meta charset="UTF-8">
     <meta name="viewport" content="width=device-width, initial-scale=1">
     <link rel="stylesheet" href="styles.css">
     <!-- 1. Load libraries -->
     <!-- Polyfill(s) for older browsers -->
     <script src="node_modules/core-js/client/shim.min.js"></script>
     <script src="node_modules/zone.js/dist/zone.js"></script>
     <script src="node_modules/reflect-metadata/Reflect.js"></script>
     <script src="node_modules/systemjs/dist/system.src.js"></script>
     <!-- 2. Configure SystemJS -->
     <script src="systemjs.config.js"></script>
     <script>
         System.import('app').catch(function(err){ console.error(err); });
     </script>
 </head>
 <!-- 3. Display the application -->
 <body>
 <my-app>Loading...</my-app>
 </body>
</html>Note: In this file we have mentioned the path for the .js files from node_module folder.
If you are using gulpfile then the path will come from libs folder. -
Right click wwwroot folder and add new directory/folder named as app.

- Right click app folder and add typescript file named as main.ts.

-
Copy paste below code in main.ts file
import { bootstrap } from '@angular/platform-browser-dynamic';
import { AppComponent } from './app.component';
bootstrap(AppComponent); - Right click app folder and add typescript file named as app.component.ts.

-
Copy paste below code in app.component.ts file.
import { Component } from '@angular/core';
@Component({
selector: 'my-app',
template: `
<h1>Angular 2 Demo</h1>`,
})
export class AppComponent { } - Now open the Terminal and run command npm start.

Application will opened in browser showing below results:

-
Now we will implement Unit testing in same application using jasmine core.
- Install jasmine package by running below command in Terminal:
npm install jasmine-core --save-dev --save-exact.

This will create a jasmine-core folder inside the node_module folder.
This will also update package.json file adding jasmine core to it.

-
Right click wwwroot folder and add new html file named unit-tests.html.

Note: This file should be create as a sibling file where index.html file is available.
-
Copy paste the below code in unit-tests.html file.

<!DOCTYPE html>
 <html>
 <head>
     <meta http-equiv="content-type" content="text/html;charset=utf-8">
     <title>Ng App Unit Tests</title>
     <link rel="stylesheet" href="../node_modules/jasmine-core/lib/jasmine-core/jasmine.css">
     <script src="../node_modules/jasmine-core/lib/jasmine-core/jasmine.js"></script>
     <script src="../node_modules/jasmine-core/lib/jasmine-core/jasmine-html.js"></script>
     <script src="../node_modules/jasmine-core/lib/jasmine-core/boot.js"></script>
 </head>
 <body>
 </body>
</html> -
Right click app folder and add new typescript file named student.ts.

-
Copy paste below code in student.ts file
export class Student {
id: number;
name: string;
}
-
Right click app folder and add new typescript file named mock-students.ts.

-
Copy paste below code in mock-students.ts file.
import { Student } from './student';
export var STUDENTS: Student[] = [
{ "id": 11, "name": "Ravi" },
{ "id": 12, "name": "Pravin" },
{ "id": 13, "name": "Almas" },
{ "id": 14, "name": "Aarti" },
{ "id": 15, "name": "Kishore" },
{ "id": 16, "name": "Swapnil" },
{ "id": 17, "name": "Uday" },
{ "id": 18, "name": "Suryakant" },
{ "id": 19, "name": "Aditi" },
{ "id": 20, "name": "Rahul" }
]; -
Right click app folder and add new typescript file named student.spec.ts.

Notice the ".spec" suffix in the test file's filename, appended to the name of the file holding the application part we're testing.
-
Copy paste below code in student.spec.ts file

import { Student } from './student';
 describe('Student', () => {
     it('has name', () => {
         let student: Student = {id: 11, name: 'Ravi'};
         expect(student.name).toEqual('Ravi');
     });
     it('has id', () => {
         let student: Student = {id: 11, name: 'Ravi'};
         expect(student.id).toEqual(11);
     });
 });
By convention, our test always begin with a describe that identifies the application part under test.
-
Modify the unit-tests.html file inside body tags copy paste below code.

<body>
  <script src="app/student.js"></script>
  <script src="app/student.spec.js"></script>
</body>

Note: we are referencing the javascript .js files and not the typescript .ts file. - Modify the package.json file look for start tag and add below code to it.
"test": "live-server --open=unit-tests.html
- Run below command in Terminal “npm install -g live-server” this will install the live-server
![]()
- Live – server is added in devdependencies
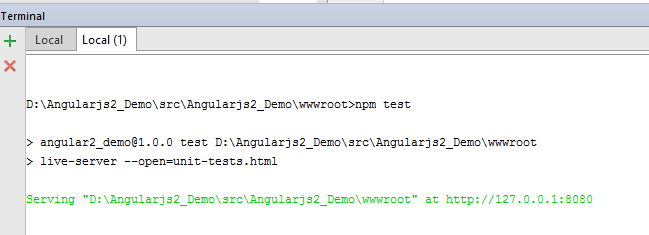
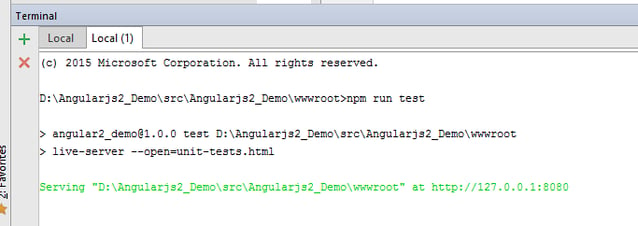
- Now run the command “npm test” or “npm run test” then the unit-tests.htmlwill open in a browser with Jasmine HTML test output:
- You will see the result pass in GREEN color

- Now update the test to get the result failure as shown below, change the expected result to different from actual result.
it ('has name', () => {
let student: Student = {id: 11, name: 'Ravi'};
expect(student.name).toEqual('Manoj');
}); -
Now refresh the unit-tests.htmlin a browser and see the Jasmine HTML test output:
You will see the result failure in RED
-
Click on spec list and you can see the list of all test either passed or failed as shown below.

Note: on clicking the test list we can run the individual test again separately.
Would always like to address questions from the readers. Kindly post them in the comments section below.