The tutorial covers a basic example of how to build a simple API in ASP.NET Core using Entity Framework Core and SQLite as the database provider.
SETTING UP THE API PROJECT
First, we will set up the main API project using the steps below:
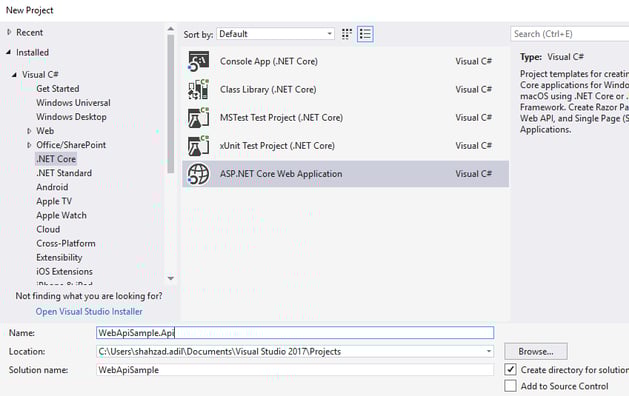
- Fire up the new project wizard from File -> New -> Project
- Select .NET Core as a platform and ASP.NET Core Web Application as the template for a new project
- Provide a project and solution name
- Click OK to create a new project
Select API from the list and click OK
SETTING UP DATA ACCESS
To test the API, we would need to set up some data access. This would enable us to experience the API working in real-time. We will be using Entity Framework Core with this and SQLite as the database provider.
Install required libraries
- Open up Tools -> NuGet Package Manager -> Manage NuGet Packages…
- Search for and install packages
- Microsoft.EntityFrameworkCore.Sqlite
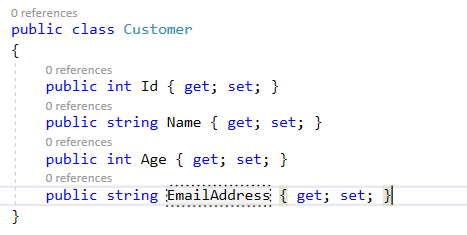
- Add a data class to your project doing CRUD operations on an entity (Customer.cs). We would save customer data in the database and play with it.
- Add properties you want the Customer to have in the class definition
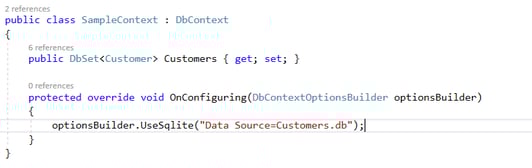
- Add a class to your API project for the database context (SampleContext.cs). This context will be the central point for data access. This will handle all interactions with the database using EF Core.
- Add the following code. This would inform the framework to use SQLite as the database provider and specify a filename for the database. Also, we included an entry for Customers in the context to let the framework know that we will be accessing customers through this context.
- Open Startup.cs
- In the method, ConfigureServices, add the line services.AddDbContext<SampleContext>(); This registers the context that we created above in the available list of services. We can then use the context directly from anywhere using the build in dependency injection.
- In the method, Configure, add the following before any call to the app.UseMvc(). The lines below are used to enable cross-origin requests. For the purpose of simplicity, we are allowing every request. In real applications, we can configure to allow only particular requests based on conditions.
app.UseCors(builder => builder
.AllowAnyHeader()
.AllowAnyMethod()
.AllowAnyOrigin());
Now we have all the infrastructure setup for accessing the data in our app. However, before that, we need the database and the necessary table structures to be created and ready for use. For that, we can use an inbuilt feature of migrations. We add migration for a change in the database. The initial migration would take care of creating the database and tables. We would have to add a migration for all the changes, and then update the database based on the changes expected.
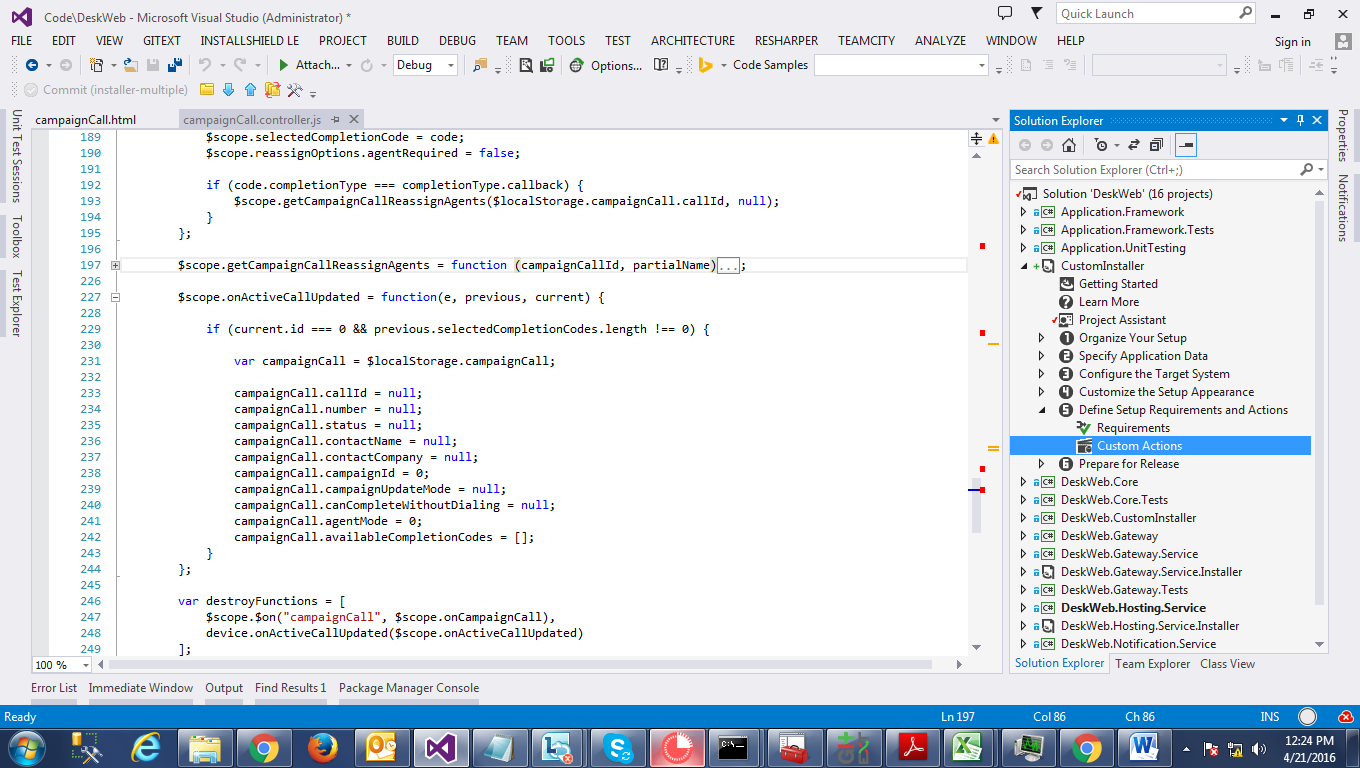
- Open Package Manager Console from View -> Other Windows
- Make sure your project is selected
- Execute the following commands
- Add-Migration InitialCreate
- Update-Database
Now that we have set up the data access and the data source, we would need to connect the API to query that data and return them to the consumers. For this, we would add an API controller and let the framework generate a lot of stuff for us.
- Right-click on the folder Controllers -> Add -> Controller
- Select the option API Controller with actions, using Entity Framework and click OK
- In the next window, for the Model class, select Customer class we just created. At this point, the controller name should be automatically generated. This can be changed if needed.
- For Data context class, select SampleContext. Click on Add.
- A new controller should be generated for you with some basic action methods for access to the customer entity.
- Your API is now ready to accept requests once you run it
We can test the API in a variety of ways. We can just hit the URL in the browser and see the results. But that would not be good for simulating requests other than GET. For better testing and visualisation, we can use Postman to test the API.
- Try to run the project for the Web API. It should default to api/values. If it loads fine, the project is working without errors. The next step is to test the API we created.
- You can use many tools to do a basic test. You can use Postman to post a data to the API and see if a record is created.
- Open up Postman tool. If you don not have it, download and install.
- Set the request type to POST and the URL to the http://<domain>/api/customers
- For passing the customer data for creating a new customer, select the Body tab
- With raw option selected, enter the following in the text area
{
"Id": "1111",
"Name": "Test",
"Age": "222",
"EmailAddress": "abc@test.com"
} - On the Headers tab, for the key Content-Type enter a value application/json
- Send the request
- Look for the response and verify if the request succeeded
The API can be consumed from any application supporting HTTP. We can consume the API using any client-side technology. It could be done using simple Javascript, JQuery or through client-side frameworks like angular etc. It basically supports any client which is capable of handling HTTP requests.
- Launch create a new project using the file menu
- Select Web and ASP.NET Web Application (.NET Framework)
- Enter project name WebApiSample.Api.Client and click OK
- Select MVC in the next step and click OK
- Add new controller (same as above) named CustomerController with action methods
- Prepare view for action methods
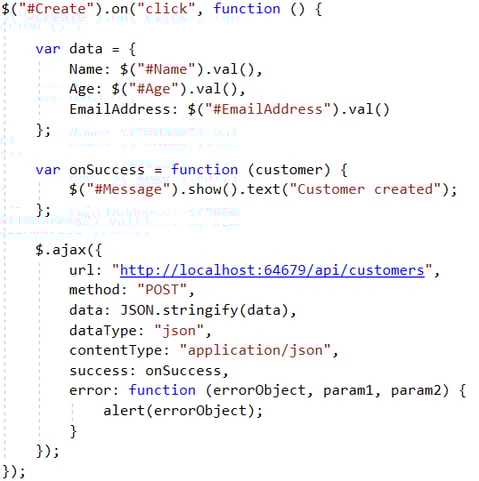
- Use JQuery in the views to call the WEB API (scripts and HTML for reference given below)
Script for creating new customer