Welcome to the second part of the Introduction to Git. In the first part we saw the basics of a Git repository, how to install Git on a Windows machine, initialize and commit our files. Those who missed it can go through it here. On the way, we also saw some of the basics of unix, to understand why Git behaves the way it does.
Now it’s time to dive a little deeper. Today we are going to see a full workflow of using Git. We will be seeing how to setup a bare repository, how to clone it into a local repository, make modifications to and push back the changes to it.
As we discussed in the previous post, bare repositories are (well, bare!) without working files and they are primarily used as ‘remote’ to share changes between people contributing to the same project. Well that’s all we need to know about a bare repo to start using one:
cd D:
mkdir mySharedLocation.git
cd mySharedLocation.git
git init --bare
This is asking Git to create a bare repository, all we changed from the last command is added a ‘--bare’ flag to it. Now what’s that dot doing in the name? Now this is not a hidden directory, the dot is not at the beginning, then? Well, it’s a convention. We saw that a local repository has a folder named ‘.git’ that contains the metadata about the versions, and the folder outside contains the working directory, but in a bare repository, there is no working directory. So to identify this folder as a Git bare repository, we append a .git to the name.
Well, now we have our first bare repository. What do we do with it? Of course we can’t create a file in it and say start versioning this one is a bare repo! Simple, we clone it. Yeah technically, clones are genetically identical, and so are these, for that is what matters in the land of versioning. Everything that was there with the bare repository is brought down to a clone, and with the added ability to have a working directory with it. And yes, it also means that the cloned repository will have a ‘.git’ folder.
cd ..
mkdir myLocalRepo
cd myLocalRepo
git clone /d/mySharedLocation.git .
Note the space between cd and ‘..’ and also the ‘.’ in the ‘git clone’ command. No, they are not full stops. A single dot in general refers to the current directory and double dot refers to parent directory. Although in windows we can use cd.. (without space), here in bash, we have to follow the cd command standard (parents don’t get special privileges!) so a space and then a variable indicating parent directory. And we have already seen why ‘D:’ is ‘/d/’, keep up with me now.
In the Git clone command we are asking Git to use the current directory for the repository. If we did not cd into myLocalRepo, we could specify the same behaviour as:
git clone /d/mySharedLocation.git myLocalRepo
“warning: You appear to have cloned an empty repository.” Git knows! Of course, we did, we had not added any files to the bare repo, how could we? Now we shall! We can now see a single folder, .git, in myLocalRepo directory. You see? It’s the same old local repository we dealt with last time; we already know how to add files to it don’t we?
So let’s add some files, but this time we are going to use the touch command. It is used to change the access/modification times of a file, like the last ‘touched’ time of a file, but when you ‘touch’ a file that does not exist, by default, it creates them, blank files.
touch file1.txt
We can see the file file1.txt in myLocalRepo in Windows explorer. Next:
git add file1.txt
git commit -m “This is the first file added from localRepo.”
We can verify that there is nothing else to commit by checking the ‘status’. This is all same just as the last time, then where does the bare repository come into play? Now, when we are going to share our file1 with another user, remember we discussed about a term ‘origin’, origin is the path where our repository originates from, was cloned from- in this case, the bare repository mySharedLocation.git. In Git, ‘origin’ is a type of remote location which defaults to repository we cloned from, so there can be multiple remotes in a repository.
We can share changes between remotes, copy modifications that have been done and send the ones we have done in our repository, like in this case file1.txt that we added to our local repository. The terms are ‘pull’ to pull/download/receive content from a remote and ‘push’ to push/upload/send content to a remote. Before we send our changes, there is another term we have to see.
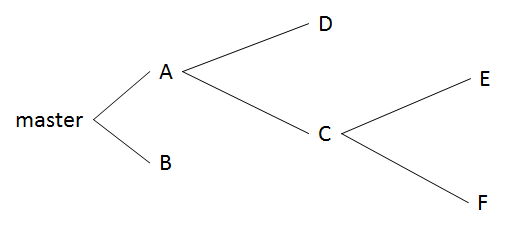
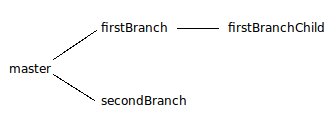
We saw this word last time but did not discuss - Branch. A branch is simply a single thread of development, and for any deviation from the thread a new branch should be created. If we imagine Git as a tree, a deviation in the trunk of a tree is what we call a branch, and a further deviation from the branch is yet another branch. Similarly, in Git, a deviation, like a new functionality or a bug fix can be developed on a new branch. The default branch, trunk, is called master. That is what the bash has been telling us in the bracket next to the repository path. Well, if there are branches, there should also be merges, unlike in a tree, but we will see that later. For now, let us understand that we are working on the master branch. Now let us push our changes to the remote.
git push origin master
That should show some gibberish being printed on the bash console and finally it should indicate that the push was successful by showing what was pushed where with an arrow (->). In that content, it also shows us the path we evoked by ‘origin’, and something about objects. Well, these are metadata objects, storing state of the repository, but let’s not bother with them for now.
But hey, we pushed our first changes, rejoice!
Alright, but what’s the use of that? what happens to the changes we did? We’ll see that now. Let’s now assume we are another user who now has joined in the development, Bob and create a new local repository for Bob.
cd ..
mkdir bobsLocalRepo
cd bobsLocalRepo
git clone /d/mySharedLocation.git .
Did you see that? The file we created already exists in Bob’s repository! Hurray!! Mr Bob, you know who’s the boss around here, don’t you? Well, that works, unless Bob wasn’t really a boss who keeps track of his team’s code! And what about the files Bob creates or modifies? Let’s see..
touch bobsFile1.txt
We have a new file, let’s also modify the file we created, open it in a text editor and make some changes, or if you are feeling too lazy just type this:
echo "Bob modifies the file" > file1.txt
Now that’s a simple command and works the same way as it does in Windows command prompt (cmd). It’s routing the output of the echo command to the file file1.txt. Now checking ‘git status’ should show us there is one file that differs from its state in the repository: file1.txt and another file that the repository is not aware of, the new file: bobsFile1.txt. Let’s add them for versioning.
git add file1.txt
git add bobsFile1.txt
We were lucky there were just two files. At least I would certainly have gotten tired if there were even a single more. How many times am I supposed to type ‘git add’? There can be shorthands for these commands as well, but we will see them sometime later. What we are looking for here is a grouping command, let’s see some:
git add Adds the single file.
git add -u Adds all modified files, like file1.txt (also --update)
git add -A Adds all files, including the new ones, like bobsFile1.txt (also --all)
git add *.txt Adds all files that have .txt extension, meaning both, if we combine -A to it.
Handy? Now that the files are added, let’s commit and push.
git commit -m “I am Bob and I can change files.”
git push origin master
Now let’s pinch ourselves. We are not Bob anymore, we are, well, whoever we are, this is a question people have dedicated their entire lives to and are still struggling to answer, and luckily for us this is also the question which is absolutely out of our scope here. But we need the changes Bob did, but how do we get them? we pull them!
cd ..
cd myLocalRepo
git pull origin master
We can see in our working directory that Bob existed after all. He was for real, and he did modify the files! Now this was a very simple case where we did not modify the same files Bob did before we pulled his changes, and Git was easily able to merge the contents of the file file1.txt when we pulled the contents. Simultaneous modification can result in merge conflicts, and like any other, these need to be resolved and demand some calmness of mind. We shall see the branches, merging and anger management techniques in the next post.