Images are an integral and important part during any website or application development. It has a direct impact on the visual appearance & on the performance of the application/website. Higher in size, images take time to load and it slows down the page loading process. Whereas, inappropriate and low resolution images may be pixelated and they may degrade the look-n-feel of the visual.
So to overcome it, we can use the Adobe Photoshop ‘Save for web’ utility which gives us the optimized resolution (72 dpi) images for web use.
But when you are required to run ‘Save for web’ & ‘Resizing’ for tons of images, processing each image one by one manually becomes tedious and is a frustratingly time taking task.
Photoshop supports recording the actions and the facility to run that action for batch processing. But it also has a couple of limitations up to Photoshop cs6 as mentioned below –
- Photoshop does not maintain the source, hereditary/nested folder structure for the output (destination) images. Save for web only saves all the files to the folder specified when you record the action.
- In case of some file handling issues, Photoshop action throws an error & pauses/stops working, wherein we need to skip these errors manually.
I I tried to Google it to find answers and also tried couple of JavaScript solutions such as the - SFW Batch Processor, SFWCS4-5, Picture Processor etc., but unfortunately all of them didn’t work for me. Either it gave up or stopped working or even threw errors for PhotoshopCS6 and CS2.
Thanks to Russell Brown for providing new CS6 Extension script to resolve the ‘save for web’ batch processing issue like maintaining the images nesting folder structure.
How to Install ‘Dr. Brown’s Services’ for Batch processing the Images in Photoshop CS6:
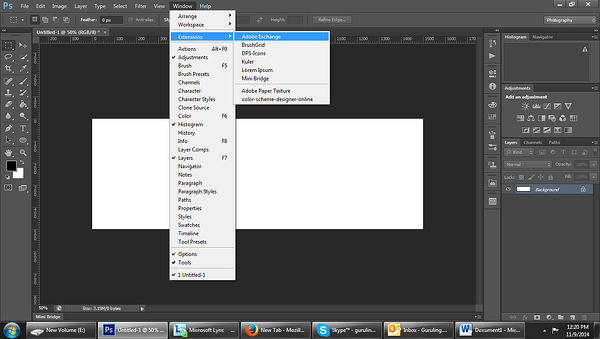
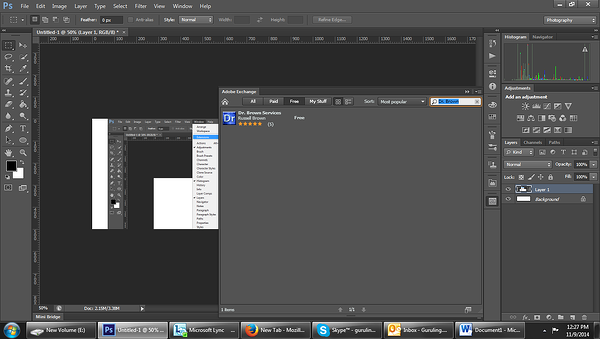
1. Go to the windows > Extensions >Adobe Exchange
2. If Adobe prompts for Login, you need to Login with your Adobe ID & password.
3. In Adobe Exchange window search for the ‘Dr. Brown Services’ in the search field.
4. You will find the ‘Dr. Brown Services’.
5. Click on the ‘Free’ button to install it.
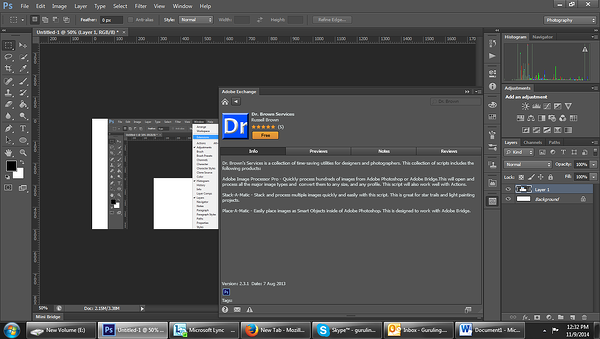
6. After installation restart the Photoshop Application.
7. Now, you will see the new link in the - file > automate > Image Processor Pro
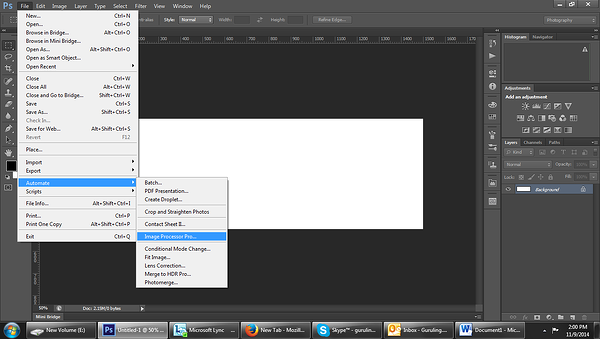
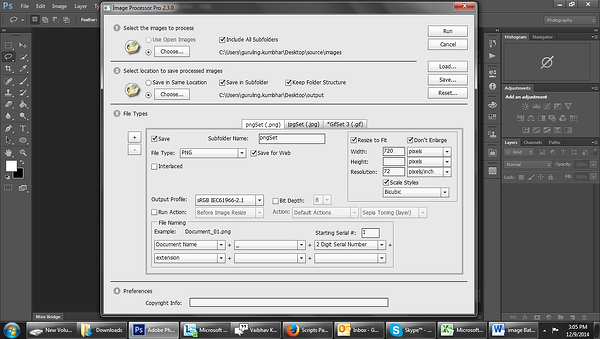
8. Click on the ‘Image Processor Pro’ link, you will see the Image Processor pro window, something like the fig. below
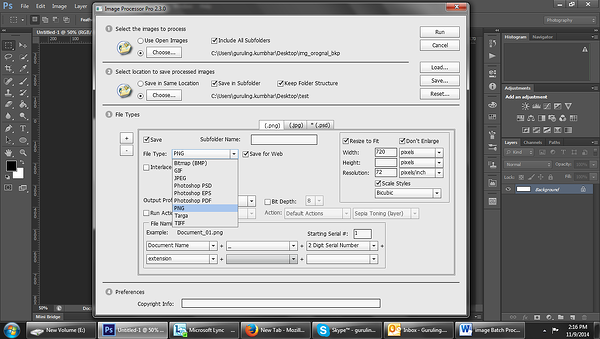
9. Choose the images main folder path which is needed to be in the process.
10. Choose the location to save the processed images.
11. For processing the subfolder’s images and to maintain the folder structure in the output (destination), make sure to tick the check boxes saying ‘Include All Subfolders’ , ‘Save in Subfolder’ and ‘Keep Folder Structure’.
12. You can create multiple set of processed images for different types of images like– png, jpg, gif, psd etc.
13. Select the required file type, width, height, resolution and other settings.
14. If you don’t want to resize smaller size images , then make sure to tick the checkbox ‘Don’t Enlarge’
15. Optionally, you can also add the Copyright Info to the images in the Preferences.
16. After desired settings, click ‘Run’ button to process the images.
17. After the process completes, you will get the folders containing processed images while maintaining the inside folder structure.
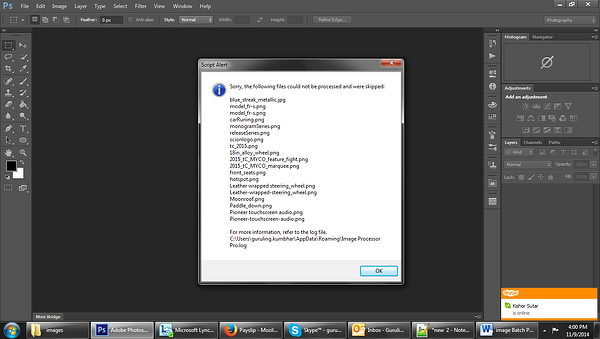
18. While processing, ‘Image Processor Pro’ skips the images which are unable to process and prompt log after complete process.
Cons:
While processing, it will pick all format images (like jpg, png, gif) from the source folder and convert/save it to the destination folder. Due to this we will get the extra additional files.
For example – If you select file type png to process, then it will convert and save other file types also such as the gif, jpg etc. into the png format and you will get the additional needless png files.
I will come up with one solution as below -
Solution:
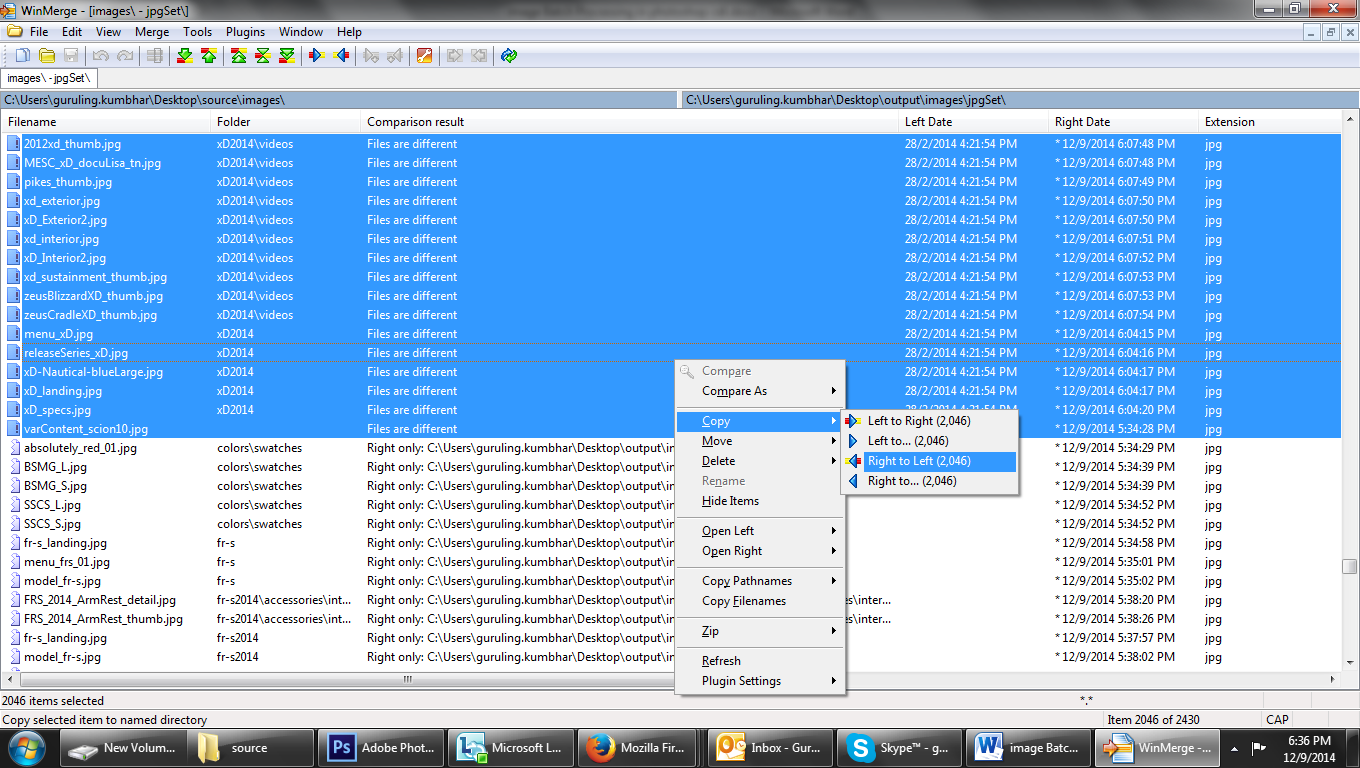
- Keep the source folder backup and one extra copy to compare and merge with ‘Win Marge’.
- Check how much type of images you have in the source folder like - png, gif, jpg etc.
- While processing the images, define separate folder for each file type like pngSet, gifSet, jpgSet in the ‘Subfolder Name’. See below screenshot for the ref.
 4. After processing, compare each folder set with the source images folder by using Application like ‘Win Merge’ & overwrite source files with only those files which is present in the both side (in Win Merge which shows ‘file is different’ in comparisons result column).
5. Finally you will get the source folder having the entire optimized image for the web maintaining the nested folder structure as it is.