

CAC
The Common Access Card is a secure identification for user of a system. It is a Smart Card in that it has an embedded chip which, along with a secret personal identification number (PIN) code, securely identifies the card holder.
Web sites secured by CAC require the user to swipe the card through a card reader that is attached to their personal computer. The user must also enter the PIN code before they can gain access to the web site.
Enable CAC authentication
Your web site needs to enable X509 certificate-based authentication. X509 certificates are files that prove that the user is who they claim to be. The Common Access Card contains one (or more) of these certificates and presents it to your web site when the user tries to log in.
X509 certificate working - X509 user security needs two files. Each user of your site needs an X509 certificate file. This file is issued to every user that needs one, by a certificate authority. In this case the file comes to the user embedded on the CAC (smart card).
The second file is the Certificate Authority (CA) file. For CAC, this file comes from the authority (ex. PIVCard providers) as a plain old file. These CA files are installed on your website (on server) and let your website know that it can trust users with a Common Access Card.
Enable CAC authentication on Tomcat
1. Create the key & cert for the Tomcat server - Go to any directory where you want to generate the keys and open command prompt and run following command -
keytool -genkey -v -alias tomcat -keyalg RSA -sigalg SHA256withRSA -validity 365 -keystore <pathToYourDirectory>/tomcat.keystore -storepass ezestpass -keypass ezestpass -dname "CN=localhost, OU=orgUnit, O=org, L=pune, ST=MH, C=IN"
pathToYourDirectory - this is path to your directory where you want to store the generated keystore file, if not given then the keystore file will get saved to the directory from where command prompt is opened
genkeypair :- generates a key pair (public and private key)
keyalg :- specifies the algorithm to be used to generate the key
sigalg :- specifies the algorithm that should be used to sign the self-signed certificate.
validity :- specifies the days till when this certificate will be valid. It is good practice to keep this low and keep changing the self signed certificate periodically for security purpose.
Public key generated by this command will be wrapped into an X.509 self-signed certificate and stored with the private key on the keystore created.

Once you enter
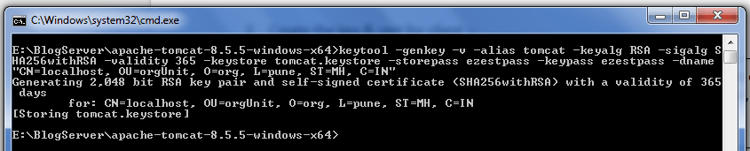
Note - that the storepass and keypass has to be the same here. The CN should be the host/machine name that will appear in the HTTPS URL when accessing this Tomcat, so e.g. localhost.
2. Create the key & cert for client:
keytool -genkey -v -alias ezestKey -keyalg RSA -storetype PKCS12 -keystore ezestKey.p12 -storepass ezestpass -keypass ezestpass -dname "CN=ezestuser NEU, OU=ezestTest, O=ezestOrg, L=org, ST=MH, C=IN"
This looks and is similar to step first, but we are storing this into a different keystore (because the server/Tomcat doesn't have your private key) of storetype PKCS12. On Windows, you can double-click and import this *.p12 file into IE, or add it to Firefox via Tools / Options, Security, Certificates, View Certificates, Import. You'll have to type in the mypassword (above). BTW, again the storepass and keypass *HAS* to be the same here, else Windows/IE or Mozilla Certificate importing will fail.
3. Now we need to add the certificate (containing the public key) to the Tomcat keystore so that it recognizes this client certificate, by first exporting it from the keystore from step 3 and then importing it into the keystore from step 1:
keytool -export -alias ezestKey -keystore ezestKey.p12 -storetype PKCS12 -storepass ezestpass -rfc -file ezestKey.cer
Now import this exported certificate to the keystore we have created in first step
keytool -import -v -file ezestKey.cer -keystore tomcat.keystore -storepass ezestpass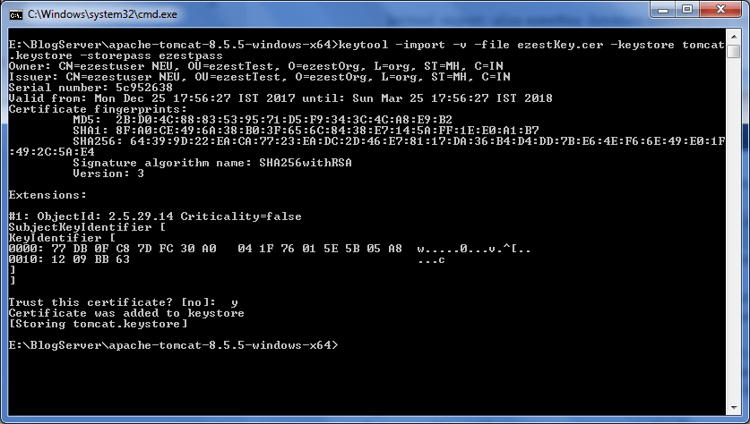
4. Download the Certificate Authorities (CA) file of the authorities against which you have to verify the smart card.
Digital certificates loaded into smart cards are issued against such Certificate Authorities file. For our example we have used PIVKey smart card, so we have to download it’s server CA file from below link:
http://ca.pivkey.com/
This file has to be imported into keystore file created in first step. To create a secure connection between client and server, tomcat server will demand for certificate and its private key (pin/password of the smart card) and will verify those credentials against this CA file.
To import this certificate into keystore created in first step run below command
keytool -importcert -file <pathWhereThisCertIsStored>\server-ca.crt -keystore tomcatezest.keystore -alias serverca
After enter provide password mentioned in first step
Provide “y” when it asks “Trusts this certificate” and enter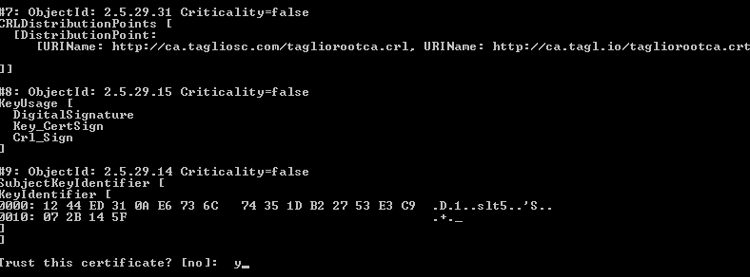
5. Now enable tomcat server to ask for certification, to do so in tomcat-8.0.32\conf\server.xml write below configuration for SSL connector
<Connector clientAuth="true" port="8443" scheme="https" secure="true" SSLEnabled="true" keystoreFile="<pathWhereKeyStoreIsSaved>\tomcatcaphenry.keystore" keystorePass="ezestpass" truststoreFile="<pathWhereKeyStoreIsSaved>\tomcatcaphenry.keystore" truststorePass="ezestpass" SSLVerifyClient="require" SSLEngine="on" sslProtocol="TLS"/>
scheme:Default value for this is http, but for SSL case server should run on https (secured protocol).
sslEnabled: Default value is false. To turn on SSL handshake/encryption/decryption on a connector this value is set to true.
SSLVerifyClient: This is Set to required if you want the SSL stack to require a valid certificate chain from the client before accepting a connection.
sslprotocol: Default value is TLS (Transport layer security), this provides communication security over computer network. This enables encryption of data while communicating to maintain data integrity.
SSLEngine: This initializes the native SSL engine, then enable the use of this engine in the connector using the SSLEnabled attribute.
clientauth: Default value is false. If this is set to true server demands for certificate before accepting the connection.
keystorefile: The pathname of the keystore file where you have stored the server certificate (self signed certificate & certificate authority file of concerned authority) and key to be loaded. You can specify an absolute pathname, or a relative pathname
keystorepass: Default value is “changeit” if not provided while creation of keystore. In first step we have provided the password for later use.
truststorefile: This is the keystore where CA & signed certificate lies, in our case it is same as of above keystorefile.
truststorePassword: password of truststorefile.
6. Now hitting the https URL (https://localhost:8443/) will ask to choose certificate
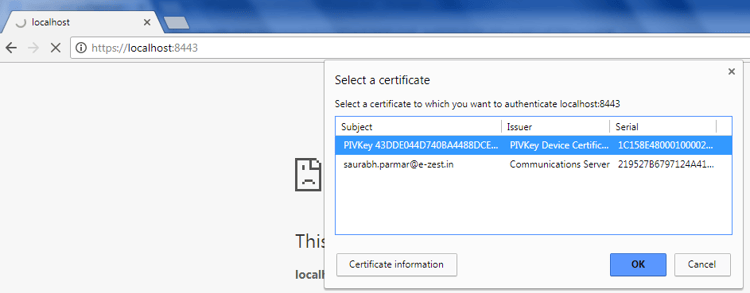
After choosing certificate, pop up window to enter pin will open.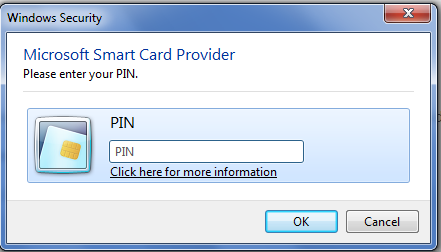
After providing pin you can connect to the website.